Rebuilding a VDISK
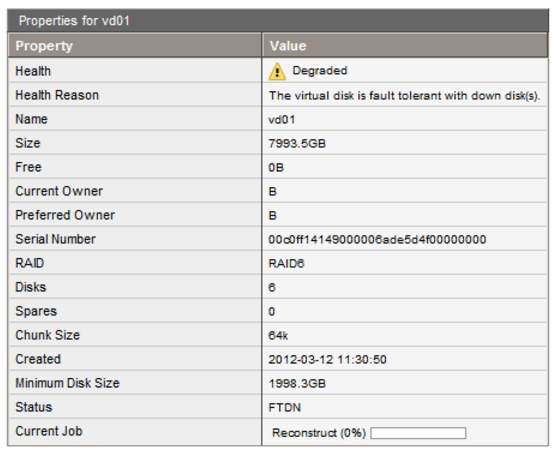
When a defective drive has been replaced in a Dothill system, the user must check that the RAID array has been rebuilt. To do this, the user should login to the web management interface and confirm that the rebuild is in progress, or has completed. When the rebuild is complete, the VDISK should no longer be listed as "Degraded".
If the VDISK is listed as degraded and there is no rebuild job in progress, a manual rebuild may be required.
Steps
As in most RAID systems, the easiest way to rebuild a VDISK, or virtual drive, is to nominate the newly fitted replacement disk as a spare drive.
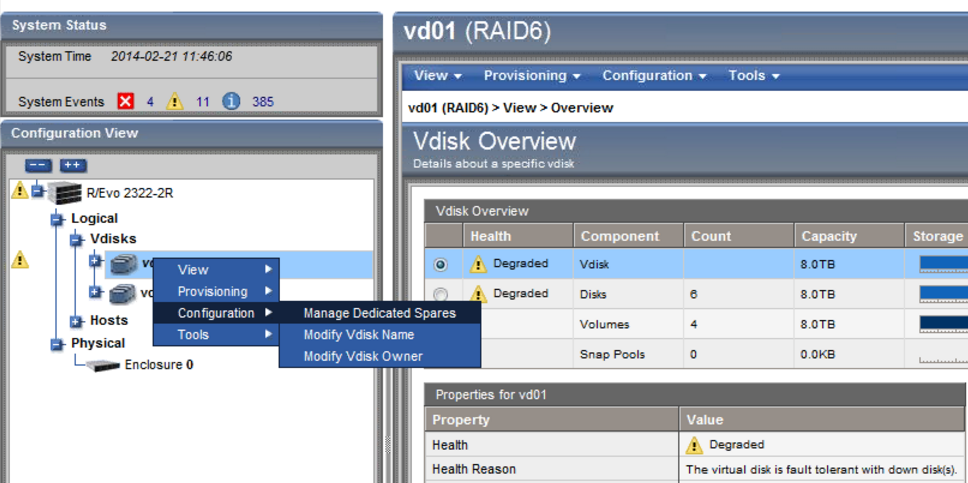
- Right hand click on the Degraded VD on the left hand menu tree.
-
Then go into Configuration, and then Manage Dedicated Spares
-
You will be presented with a graphical view of the unit, and will be able to select unused drives. Tick the drive, and then select "Modify Spare Configuration" to apply the change.
-
Ensure the Unit is rebuilding by refreshing the view and looking at the VDISK status.
- You should also be able to see events in the Dothill event log which show that the spare is being used and that VDISK reconstruction has started.
Applies to:
- Dothill Storage systems supplied by Stone Computers (exact instructions apply to the 2012 or newer models)
