RAID Monitoring and Configuration with an Intel or LSI RAID Card
Intel and LSI RAID cards provide tools for RAID system monitoring and configuration. There are various CLI and GUI tools which can be used when an operating system is running, as well as RAID BIOS tools which can only be used when the operating system is not running.
The most useful GUI tool is the Intel RAID Web Console 2 (or, LSI MegaRAID Storage Manager (MSM), which is in essence the same product). This tool can be installed on a Windows based system and provide health reporting, alerting and configuration functionality for the local system as well as remote systems.
VMWare ESXi does not support the installation of GUI utilities directly on the host, or into the VMWare VCenter server or VSphere client. However, the Windows RAID Web Console 2 (RWC) installed onto a separate physical Windows system, or running on a Windows Guest operating system inside the VMWare ESXi host, can connect to management agents installed inside ESXi.
Before you begin: It is recommended that you attempt this installation on a laboratory or test system before deploying this into a production (live) system or environment. Hardware and software versions vary. We recommend that you test your exact system configuration outside of your production network first to prevent problems or unexpected downtime. Alternatively, only attempt this procedure if your network can run with one VMWare ESXi host system missing for the time that it takes you to test this procedure, and revert or reinstall if necessary if things go wrong.
Sections
Pre-requisites:
- Your host system that is being setup for monitoring should be running ESXi 5.x
- Even if the controller is supported by Intel RWC 2 / LSI MSM in Windows, there must be a SMIS provider listed as being available for it, for VMWare. If there is no SMIS provider listed for your model of controller, this procedure may not work.
- For the LSI / Intel management console: A Guest Windows operating system inside a host or a separate Windows physical server. The Windows level needs to be Server 2003 or later. Desktop operating systems such as Windows 7 are not recommended. Consider that this machine might not be available to manage the host that it resides on if that host is suffering from a RAID failure, in the case of local to host virtual machine storage.
- The host must contain an Intel or LSI Hardware or Firmware RAID Card/Controller. LSI ESRT2 Firmware RAID is supported; Intel Matrix software RAID is not.
- Ensure that your system has adequate performance and memory capacity to run without one host for at least two hours. Plan to perform this operation in a period of low demand.
- You will need full administrative rights on the Windows server; you will also need to know the root password of the ESXi host.
- You will need the VSphere client to manage the ESXi cluster or ESXi host.
Downloads - you will need:
- The WinSCP tool, located here.
- A copy of the PUTTY tool, located here.
- A copy of the latest Intel RAID Web Console 2 or LSI MegaRAID Storage Manager, at least version 13 in both cases.
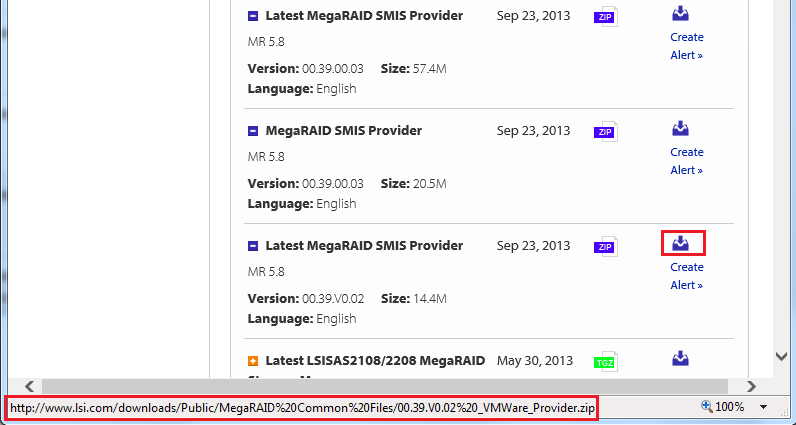
- Download the latest VMWare SMIS (Storage Management Initiative – Specification) Provider Package. LSI often list more up to date packages than those available on the Intel web site. You may wish to find the corresponding LSI model of an Intel controller, where it exists, and use the updated LSI package.
- For example, the Intel RS2BL080 corresponds to the LSI 9260-8i.
- Intel Controller modules which are bespoke to Intel Systems or motherboards, whilst they may have an LSI chip, likely may not have a corresponding LSI part. You will need to look for the Intel SMIS package.
- An example of the LSI 9260-8i VMWare SMIS provider download is below.
Stage 1 - Install Intel RWC2 / LSI MSM
- Install Intel RAID Web Console 2 (version 13 or higher) or LSI MegaRAID Storage Manager onto a physical Windows server, or onto a guest Windows operating system.
- Ensure that you can open the login screen of RWC 2 / MSM. You will not be able to connect to the VMWare host yet.
- On your Windows system, install WinSCP.
- Again, on your Windows system, put a copy of PuTTY or a shortcut to PuTTY onto your desktop.
- Log into your VSphere client.
- On the ESXi host that is to be set up for monitoring, migrate any virtual machines to another host (including the guest that may now have Intel RWC 2 / LSI MSM installed).
- Put the Host into maintenance mode. This is essential, as the host will need to be rebooted.
You should now have the following links or shortcuts, or similar, on your Windows desktop:
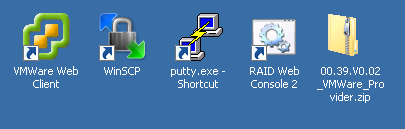
(You may have links to the VMWare web client or VSpere client on this guest or physical machine, but these can be located on a different machine).
Stage 2 - Enable SSH on the Hosts
- Using the VSphere client or VSphere web client, enable SSH on the host that is to be setup.
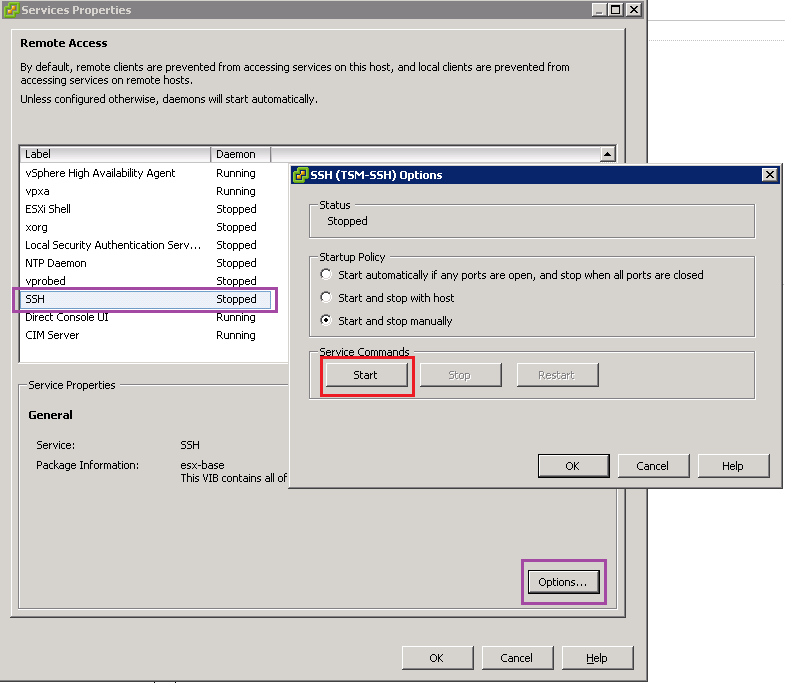
- If using the regular client, click on the ESXi Host, go to the Configuration tab, and then Security Profile, then Services. Click on Properties (for Services) on the top right hand side. Find SSH in the list and click on Options, then start it. Click OK twice to accept the change.
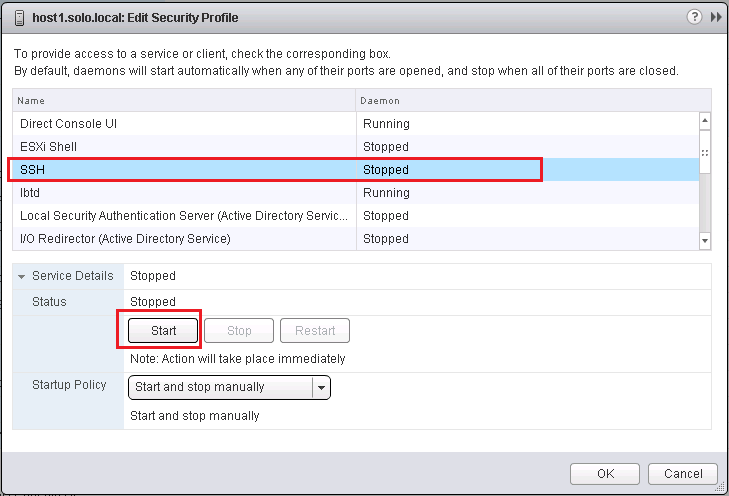
- If using the web client, click on the Host, go to Manage, Settings, Security Profile and then scroll down on the right hand side to Services. Click on Edit. Find the SSH service and start it. Click OK.
- We recommend against leaving SSH permanently enabled. The instructions above do not leave it permanently enabled i.e. after a host reboot, it will be disabled again. If you decide to leave SSH permanently enabled whilst you are performing these procedures, we recommend you disable it when complete to reduce the chances of malicious attack.
Stage 3 - Copy the VIB File
- Unzip the SMIS provider file and find the vmware-esx-provider-lsiprovider.vib file. It may be in sub-folder.
- Open WinSCP.
- Configure the connection mode for SCP and enter the Hosts management IP address and root username (usually just root) and password.
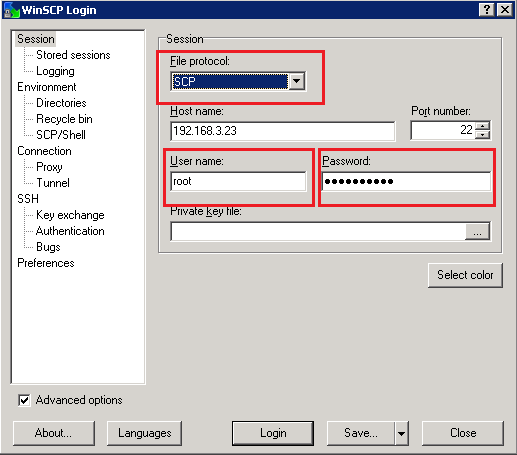
- Click on Login.
- Accept any message about an unconfirmed thumbprint (or lack of digital signature).
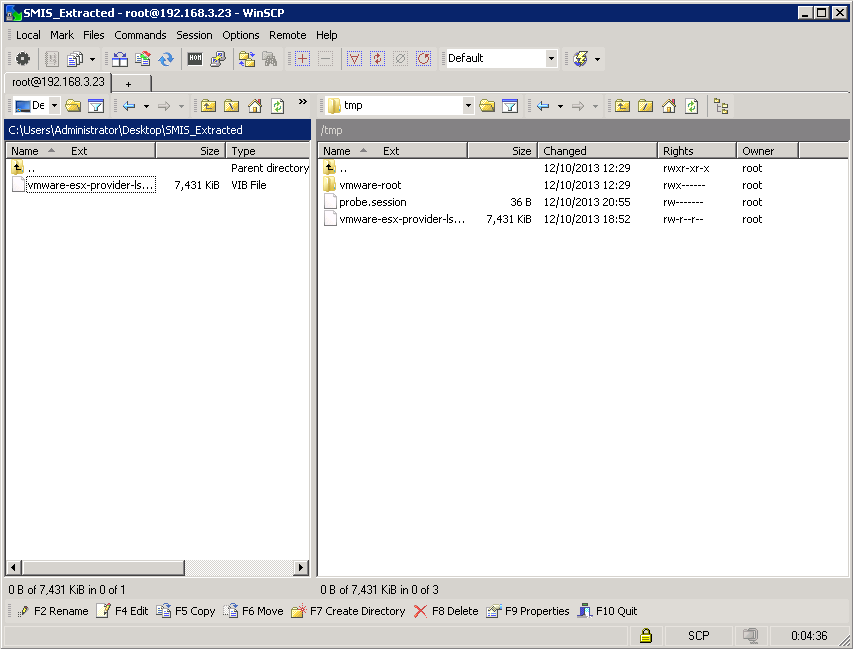
- On the left hand explorer window, navigate to the .VIB file you extracted earlier
- On the right hand explorer window, double click on the tmp folder to go into it
- Drag and copy the .VIB file to the tmp folder, as below.
Stage 4 - Install the VIB file
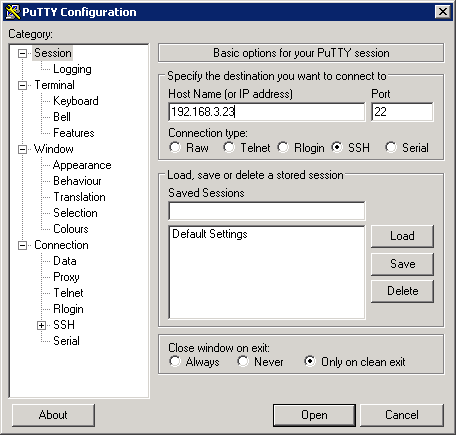
- Open PuTTY and connect to the ESXi Host, again using SSH and Port 22.
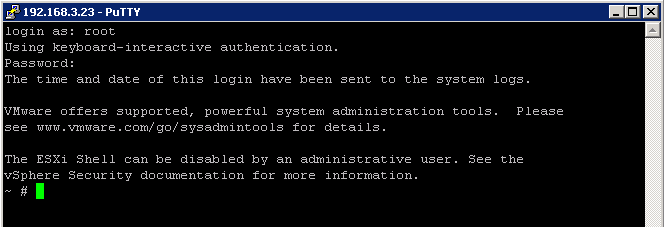
- Accept any warning about a missing digital signature or thumbprint.
- Enter the root username and password when prompted. If successful, you should have the hash - ~ # - prompt.
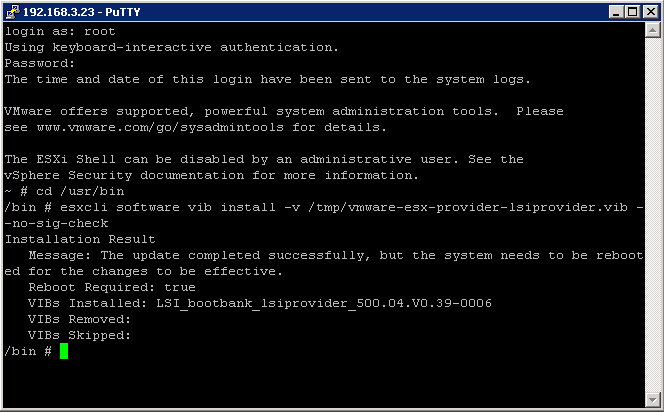
- Type in the following commands:
cd /usr/bin
esxcli software vib install -v /tmp/vmware-esx-provider-lsiprovider.vib --no-sig-check
- The system should confirm that it was successful and that a reboot is required.
- Close the PuTTY window.
- Use the VSphere Client or VSphere Web Client to reboot the ESXi Host.
- Wait for the host to reboot (i.e. you can connect to it again using the VSphere client, or the system has reconnected to the VCenter server inventory).
Stage 5 - Edit the Hosts File
- Edit the Hosts file on the Windows system running Intel RWC2 / LSI MSM and add in the fully qualified names of the ESXi hosts that you wish to manage, or ensure that the fully qualified names can be resolved through DNS.
- The Hosts file is located in C:\Windows\System32\drivers\etc.
.PNG)
Stage 6 - Try Connecting and Finish Up
- Attempt to connect Intel RWC2 / LSI MSM to the ESXi Host by IP address. If this fails, try the troubleshooting steps below.
- Take the Host out of maintenance mode and rebalance the Virtual Machine load across your ESXi hosts.
Note: If you have an ESXi 5.1 system which has not had many configuration changes, and you are using RWC 2 13.04.03.01 or LSI MSM 13.08.04.01 (as of 12/10/2013), you may find that skipping to Troubleshooting Step 9 is all you require. You could also decide that using RWC 2 / LSI MSM is not required but instead configure VCenter alerts based on the additional sensors that will now appear (see Troubleshooting Step 3). If you are running ESXi 5.5 then you may find that Troubleshooting steps 8 and 9 are required.
Troubleshooting Step 1 - check the SMIS provider installed
- Again, enable SSH for the Host.
- Connect to to the Host again using PuTTY.
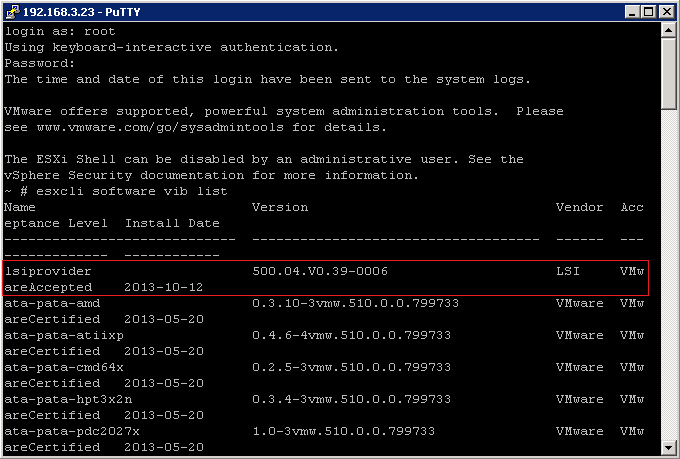
- At the # prompt, run:
esxcli software vib list
- This should give the following output or similar:
Troubleshooting Step 2 - Check Host Image Profile Acceptance Level
- Using the VSphere client, select the ESXi host that you are trying to configure.
- Go to the Configuration tab.
- Scroll down to Host Image Profile Acceptance Level.
- Check that this is set to Community Supported, Partner Supported or VMWare Accepted. If it is set to VMWare Certified the LSI SMIS will not function. Partner Supported is the default but is less secure than VMWare Certified or VMWare Accepted.

Troubleshooting Step 3 - Check SMIS Functionality
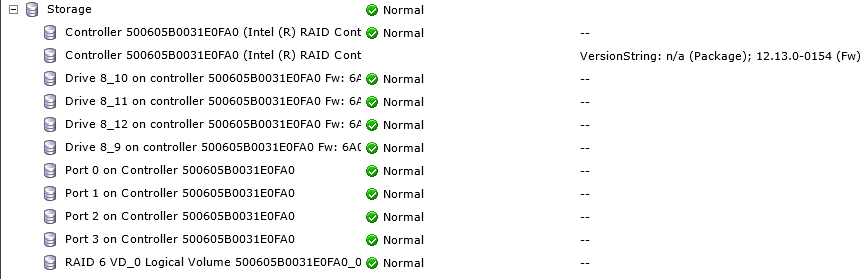
- If the LSI SMIS provider is working, under the Hardware Status of the Host you should now be able to see basic physical drive and virtual drive health.
- To see this, click on the ESXi Host that has the SMIS provider installed, and go to Hardware Status.
- Then Click on View Sensors.

Troubleshooting Step 4 - Windows Firewall
- Turn off the local Windows firewall on the system running Intel RWC 2 / LSI MSM as a short-term test, or leave the firewall enabled and ensure ports 5571 and 3071 are enabled for UDP and TCP multicast.
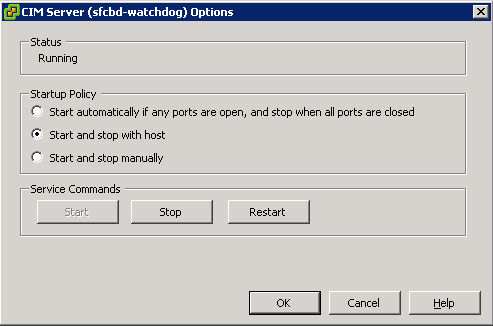
Troubleshooting Step 5 - Ensure the CIM Service is running
- Using the VSphere Client, click on the ESXi Host that you are trying to configure.
- Click on the Configuration Tab.
- Go to the Security Profile group of settings.
- Click on Properties, under Services (on the top right hand side of Services).
- Ensure that the CIM Server is running.
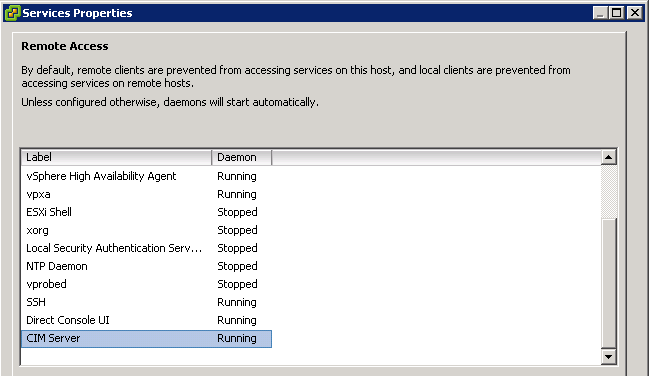
- If it is not, click on Options, and then Start the service. Then, select "Start and stop with host". Click on OK twice.
Troubleshooting Step 6 - Change the Console Method of Connection
- Open RWC 2 / LSI MSM and click on Configure Host.
- Select "Display all the systems in the network of the local server".
- Click Save Settings.
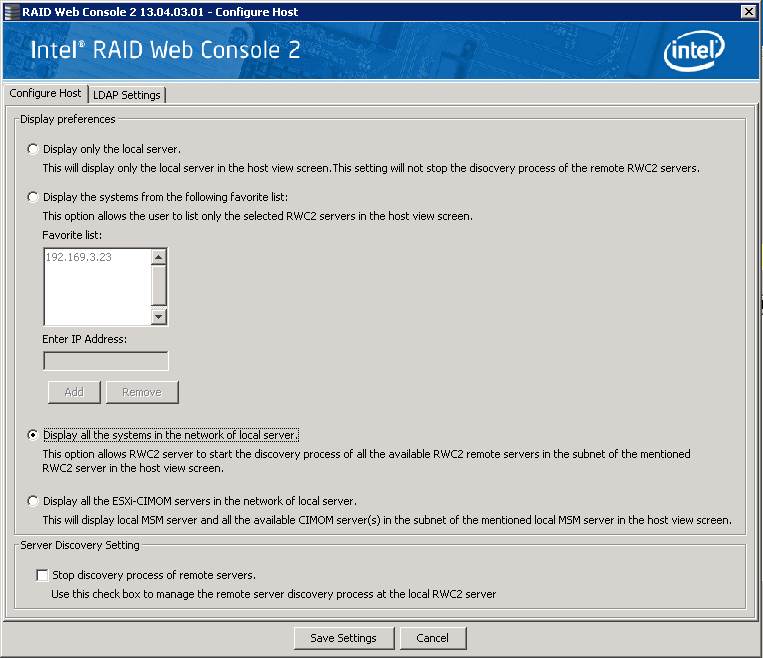
- Don't apply the change straight away if prompted.
- Then, enter the local IP address of the Windows machine (NOT the IP address of the ESXi host).
- Click on Discover Host again.

Troubleshooting Step 7 - Another alternative method of connection
- Repeat step 5 but this time select "Display all the ESXi-CIMOM servers in the network of local server."
- Repeat discovery.
Troubleshooting Step 8 - Open Port 31749 or Try disabling the ESXi firewall
To disable the firewall
- Use PuTTY to connect to the ESXi host.
- Issue this command:
esxcli network firewall set --enabled false
- Reattempt discovery. If it fails, re-enable the firewall using this command:
esxcli network firewall set --enabled true
- If discovery works, then you may need to check the firewall settings on the ESXi host. It is not recommended to leave the firewall disabled. Re-enable it above and check the firewall settings; you may need to open port 31749 to enable host to console commications.
Reminder: ESXi 5.5 hosts appear to require port 31749 to be opened through the firewall for the host system to be discoverable by LSI MSM / Intel RWC.
Troubleshooting Step 9 - Use a Multicast Proxy
The Intel RWC 2 / LSI MSM software prefers to use multicast requests, although in RWC2 version 12 and MSM version 5.3 this was apparently fixed. ESXi will only respond to unicast requests.
- Download the attached esxi_RWC-MSM-slp_helper.zip file.
- Extract it on your Windows system.
- Edit the slp_helper.php file with notepad.
- Find the line that contains
$unicast_ips = array('192.168.1.1');
- Edit the IP address to your ESXi Host. If you need multiple IP Addresses for multiple hosts, separate them by commas. For example
$unicast_ips = array('192.168.3.23', '192.168.3.22');
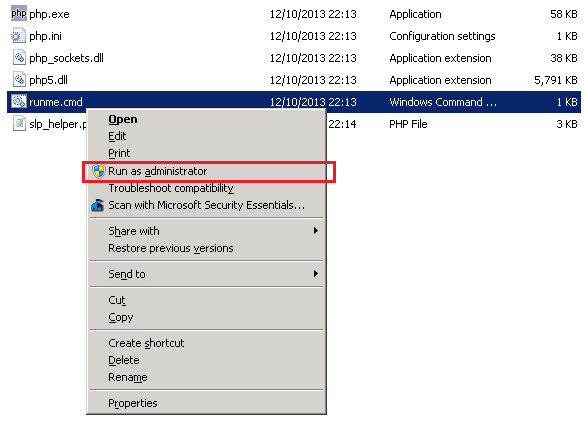
- Run the file runme.CMD as an Administrator.
- Go back to Intel RWC 2 / LSI MSM, and click on Configure host.
- Select "Display all the ESXi-CIMOM servers in the network of local server." (As in Troubleshooting Step 7).
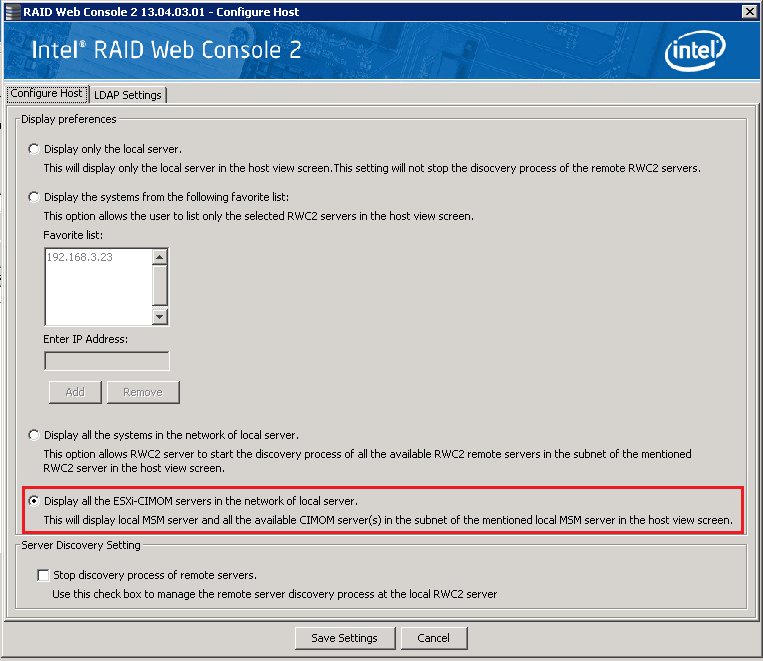
- Click on Save settings.
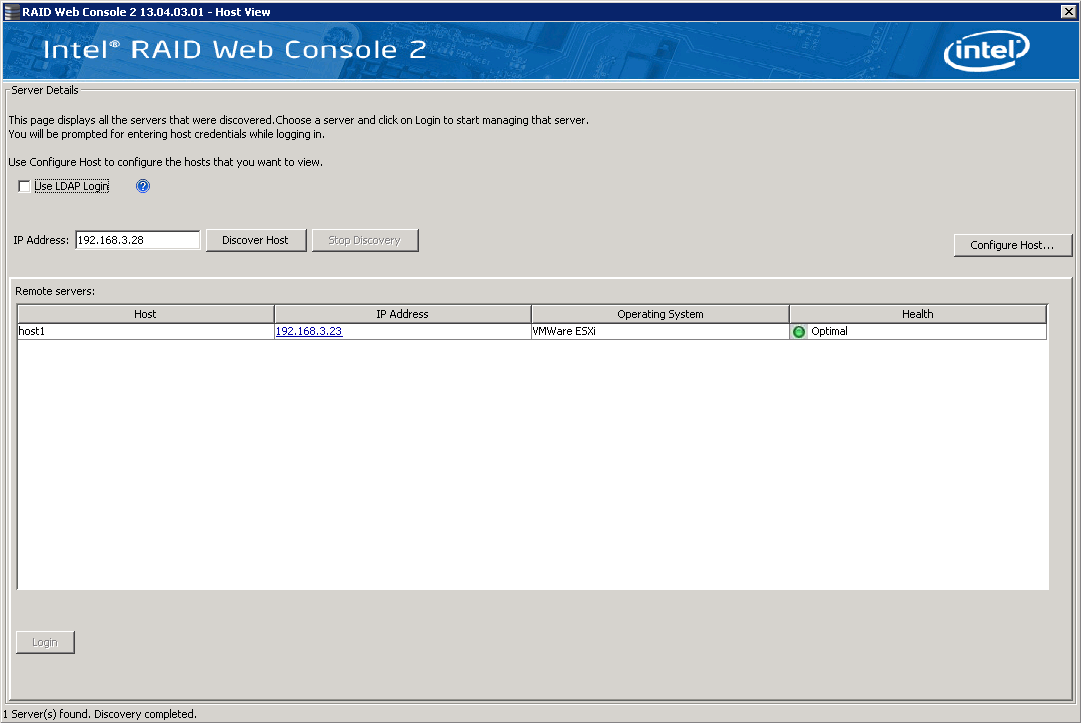
- Again, use the IP Address of the local Windows system and NOT the ESXi host in the discovery IP Address box. In the example below, 192.168.3.28 is the IP address of the Windows system.
- Now, reattempt discovery by clicking on Discover Host. You should see the SLP Helper handling the traffic.
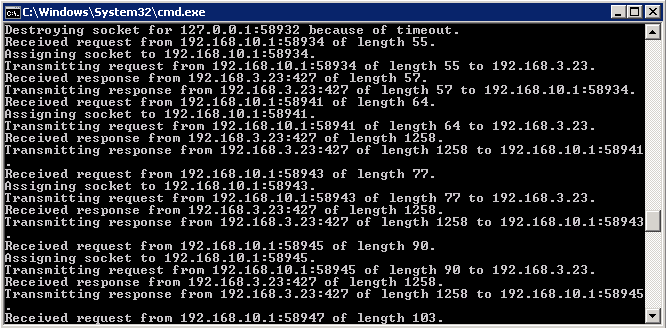
- If this method solves your RWC 2 / MSM not being able to connect, bear in mind that if you set up alerting you must ensure that the Multicast proxy is always running. It would be a good idea to configure it as a system startup scheduled task, for example, and to run it as a service, so that it was running even when you are not logged on. See the attached article for a method on how to do this.
Troubleshooting Step 10 - If MSM looses its connection to the Host
- Use WinSCP to modify the file /etc/sfcb/sfcb.cfg and change the value of KeepaliveTimeout from 1 to 100
- Restart the sfcdb-watchdog service by connecting to the host using Putty and issuing the command below:
/etc/init.d/sfcbd-watchdog restart
Troubleshooting Step 11 - DNS Or Hosts File Reminder - If your ESXi Host IP Address is shown as 0.0.0.0
- This shows that you may have a DNS problem, which means you might have skipped Stage 5.
- If your ESXi Host IP Address is shown as 0.0.0.0, add the fully qualified ESXi hostname and IP address to your Windows DNS Server, or the RWC2 / MSM Windows system's Hosts file in C:\Windows\System32\Drivers\etc.
- For example, add:
192.168.3.23 host1.local
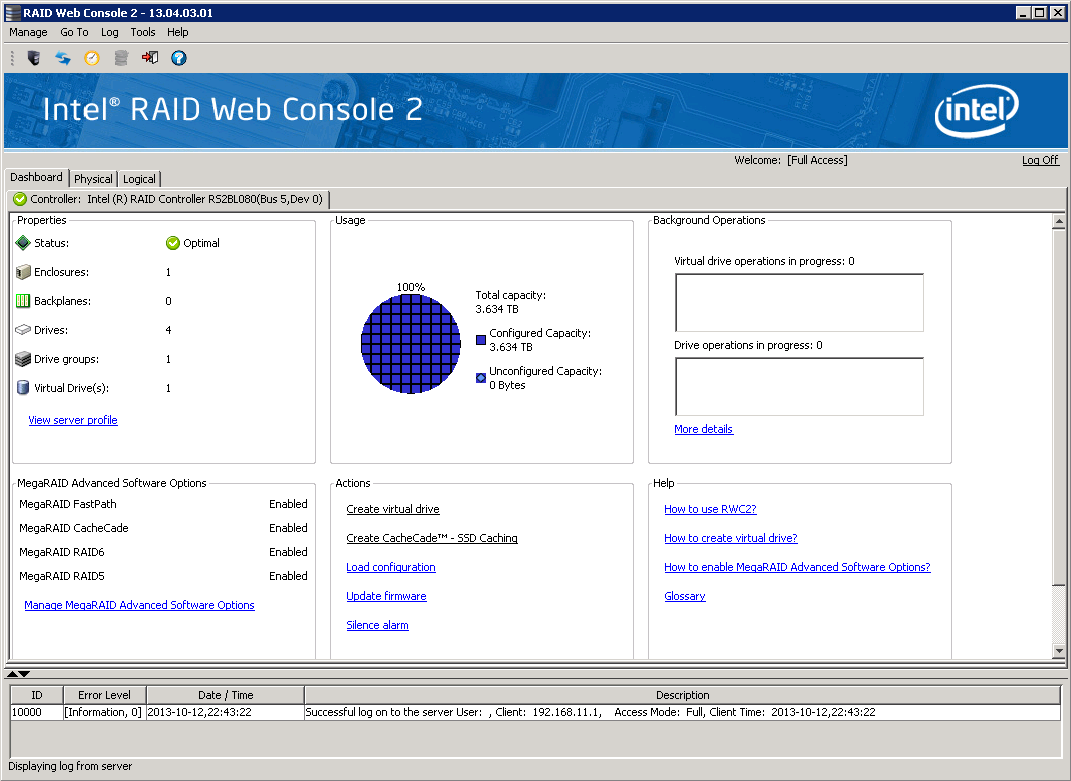
When you can Discover the Host
When you have been able to Discover the Host, you should be able to login. The username and password required are the root username and password of the ESXi Host.
Functionality Provided
The Intel RWC 2 / LSI MSM connected to an ESXi host allows you to carry out most normal function, including drive rebuilds, hot-spare configuration, and even Firmware updates (although, as with a Windows system, this requires a reboot to take effect). You can also configure email alerting.
Some of the logging options are reduced. For example, controller events that occur before the SMIS provider has loaded inside ESXi are not available.
Note: If you enabled SSH permanently earlier, we recommend you disable it at the end of this procedure. Leaving SSH enabled without a requirement for it presents a security risk as an additional attack surface is exposed. SSH is not required for Intel RWC 2 / LSI MSM to connect to the ESXi Host.
Update and Thanks:
11/9/14: Port 31749 needs to be opened on the ESXi firewall to enable host to management console communications. Thanks to Les Merryman from Micro-Masters for this contribution.
29/10/15: Included Improved Hostname instructions and KeepAliveTimeout information. Thanks to David Crowder from AZPartsmater for this contribution.
Applies to:
- Server systems running ESXi 5.x fitted with Intel or LSI Hardware RAID Controllers.