What Is JBOD Mode?
JBOD stands for "just a bunch of drives". JBOD mode passes through physical disks so that the operating system or host can see each individual drive. This is the opposite of a normal RAID controller, which groups physical disks together to form a single, often larger or fault tolerance, virtual drive.
JBOD mode is useful in some software storage solutions, such as Storage Spaces Direct, which require direct access to individual disk drives, rather than a RAID array.
Do All SAS Adapters Support JBOD Mode?
Not all adapters (HBAs) do, but many support it to a varying degree.
- Older 6G SAS RAID Adapters generally do not have a JBOD mode. Disks can only be presented as virtual drives, even if there is only one physical disk in the virtual drive.
- 12G IT/IR (initiator target/integrated RAID) are usually lower cost HBAs (host bus adapters) that support basic RAID levels of 0 and 1 (as virtual drives) using integrated RAID (IR) functionality. They often support initiator target mode too which technically is a JBOD mode solution, however many software storage vendors do not like the RAID facility being available on the same adapter at the same time. These cards often don't support turning off IR mode completely.
- 12G RAID Cards - most modern 12Gbit RAID cards support either RAID mode, with the option to present some drives individually (you can mark the drives you want to appear as a JBOD disk) or JBOD personality mode where all drives are presented as individual physical disks by default.
How Do I Enable JBOD Mode on Intel 12G SAS Adapters?
This involves changing the personality of a 12Gbit RAID adapters to turn off all RAID functionality and only enabling JBOD mode. The example below is from an Intel RMS3AC160 adapter but the instructions apply to most other RAID modules and RAID PCIe cards in the same series.
Note: Enabling JBOD personality mode will destroy and RAID volume on the disks. You should be able to move JBOD disks between JBOD personality adapters without data loss, but always make sure the HBA is in the right personality mode first, and ideally all adapters sharing disks should be at the same firmware level. In a new deployment, always deploy the latest HBA firmware before connecting the disks.
Steps:
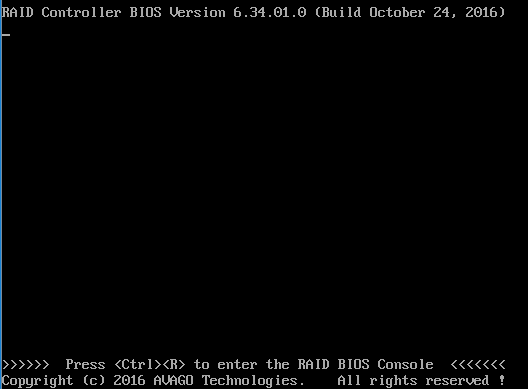
- Go into the RAID BIOS during the motherboard BIOS post. This is usually done by pressing CTRL + R.
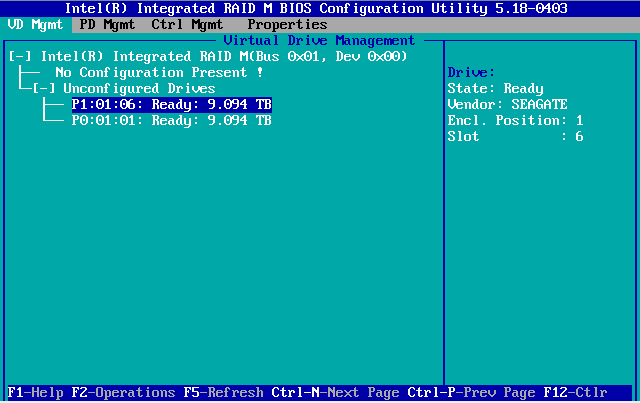
- Use CTRL-N, or CTRL-P to navigate through the different tabs to go to the Controller Management (Ctrl Mgmt) tab.
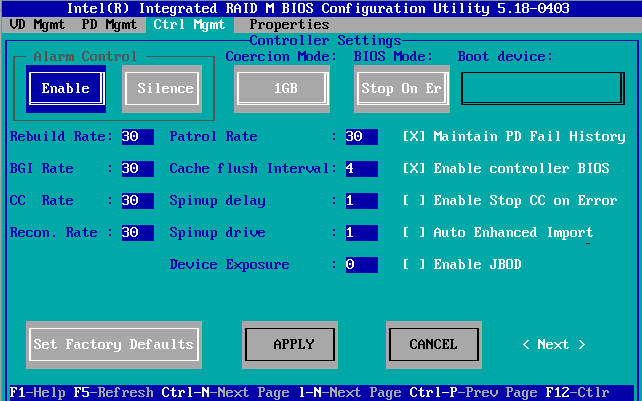
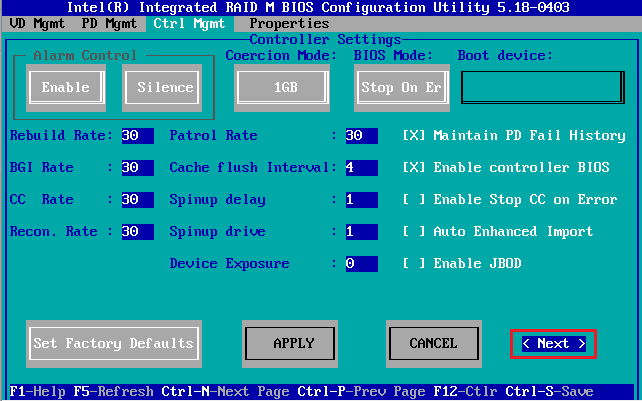
- Note the option on this screen to "Enable JBOD". Enabling this option allows you to select individual drives from the PD Mgmt tab, and create or present the drive in JBOD mode. However, RAID is still enabled on the adapter, and the adapter's "personality" is still RAID.
- If you just upgraded the HBA firmware, it is recommended to use the option to reset the controller to defaults. To do this, tab to the Set Factory defaults option and press Enter.
- To enable JBOD mode, you need to go to the second settings screen. To do this, tab to the < Next > option.
- The Personality Mode setting is the default option on this screen.
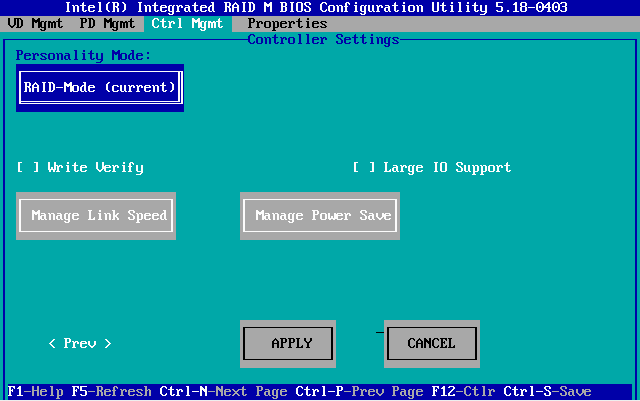
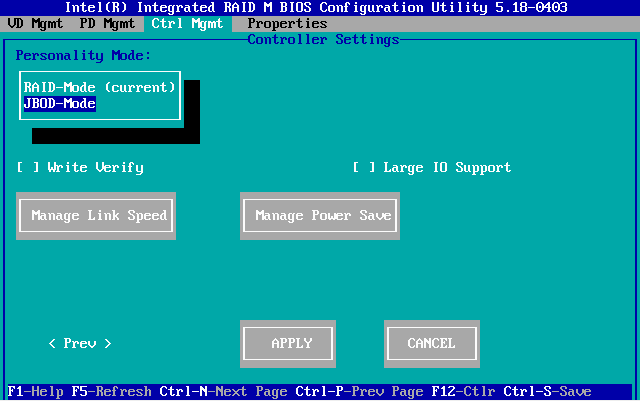
- Press Enter to see the list of personalities. Use the arrow keys to select JBOD mode, and press Enter again.
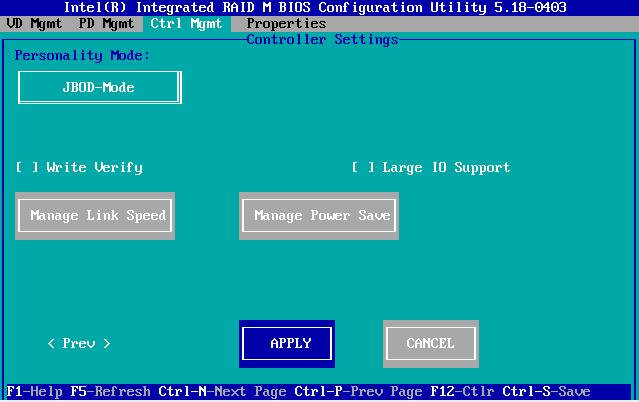
- Tab until Apply is highlighted, and press Enter to save the setting.

- Press ESC to exit the RAID BIOS, and then use CTRL + ALT + DEL, or the system reset button, to reboot when prompted.
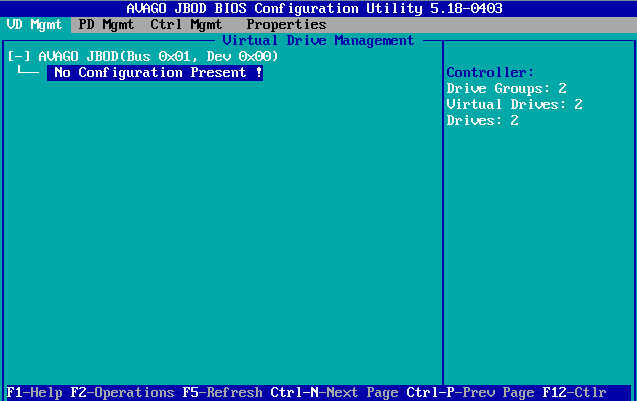
- When you reboot the system and go back into the RAID BIOS (using CTRL + R), you will see that the layout of the BIOS has changed slightly. The adapter is no longer described as a RAID adapter, but now as a JBOD adapter.
- This may cause you to need to reinstall the HBA driver in Windows. The Windows Server 2016 inbox driver is suitable for all 12G adapters from Broadcom/Avago as of summer 2016.
More Notes
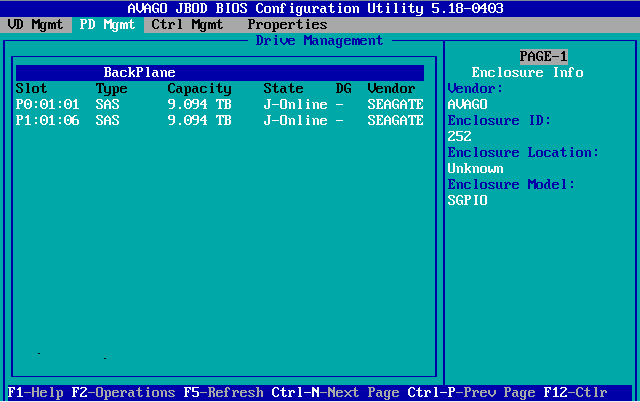
- In the physical drives screen you can see all of the "J-Online" disks, meaning that these physical disks are being presented out as physical disks.
- It is possible to delete the drive from being presented as a disk, but using the F2 operations option when a drive is highlighted, and choosing "Delete JBOD". This is not recommended, because as of time of writing, this cannot be re-added as a presentable drive, in the RAID BIOS. However, on rebooting, the drive appears to be automatically re-presented.
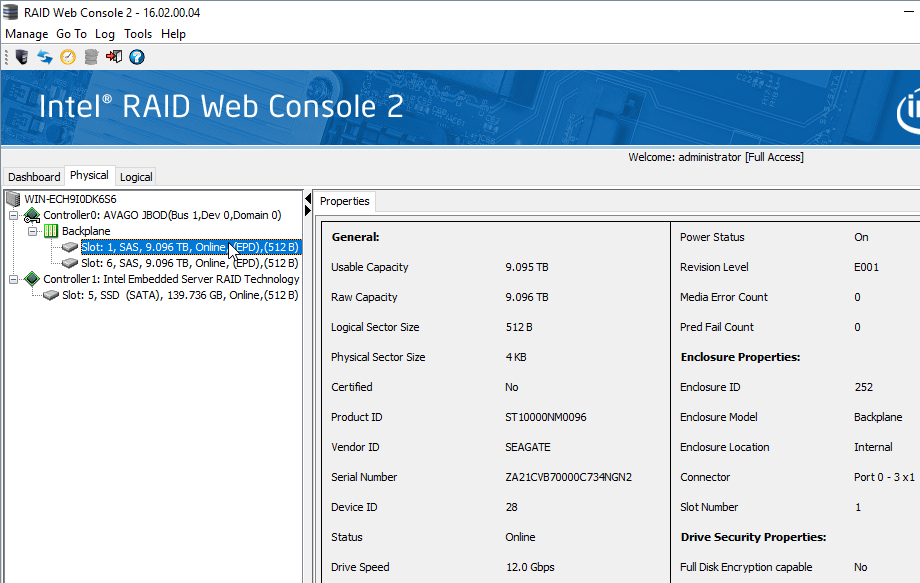
- RAID Web Console shows the JBOD drives below. Drives can be removed from being presented by right clicking the drive and selecting "Delete EPD". You can re-add the drive by choosing "Make EPD". Data should be preserved on the physical disk.
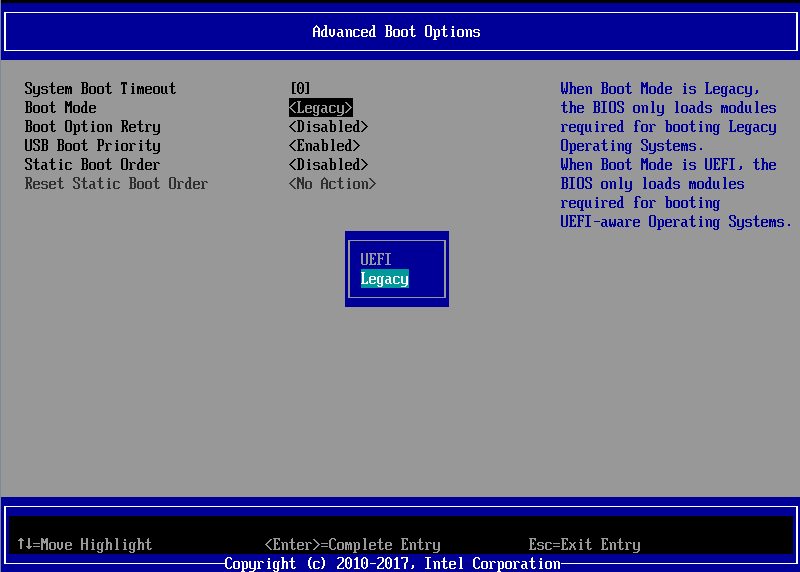
Note: If you are using an Intel server platform that uses a motherboard such as the S2600WTTY or S2600WTTYR and cannot see or access the RAID BIOS options, first of all ensure that Quiet boot is turned off the main BIOS. If this does not help, ensure the BIOS is set for Legacy boot instead of UEFI boot. (Setup Menu > Boot Maintenance Manager > Advanced Boot Options > Boot Mode
Applies to:
- Intel (Avago/Broadcom/LSI) 12G SAS RAID Adapters


