The EFI Shell
The Extensible Firmware Interface (EFI) shell is effectively a small operating system built into the system motherboard on modern servers. This provides an environment for troubleshooting and maintenance outside of the operating system.
This article describes how to access the EFI shell on an Intel Server or Workstation board and how to access resources on a USB pen drive.
Reminder: EFI tools can only be used when the main operating system is not running. If you are not in a postition to be able to down the server, use operating system tools instead. For example, for Windows based systems, Windows versions of the Hardware System Event Log (SEL) viewer are available, as are Intel / LSI RAID management and firmware upgrade tools.
How to Access Tools through the EFI Shell
Generic instructions are provided below. Exact screens and steps may vary from model to model.
- Prepare your USB key - it should be formatted using FAT32 and anything you wish to use should be pre-extracted from any ZIP file. Always extract updates or tools into simply named subfolders. The use of folders prevents the system from automatically running the update (by calling startup.nsh) when you enter the shell.
- Insert your USB key containing your tools or utilities into the server.
- Turn the system on
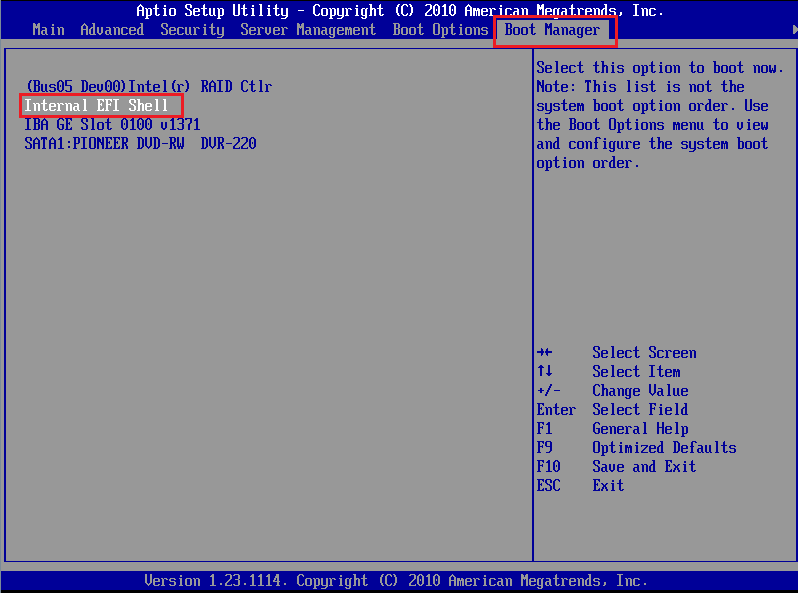
- Tap the F2 during POST to gain access to the main BIOS setup utility
- Go to the Boot Manager Menu and then select Internal EFI Shell. Press Enter to boot the EFI Shell
- Once you have entered the EFI shell you should get a screen similar to the one below. Your USB pen drive should be detected as fs0: and should be in the list of devices.

- If fs0: is not listed you will need to try and map the drive in by using the map -r command:
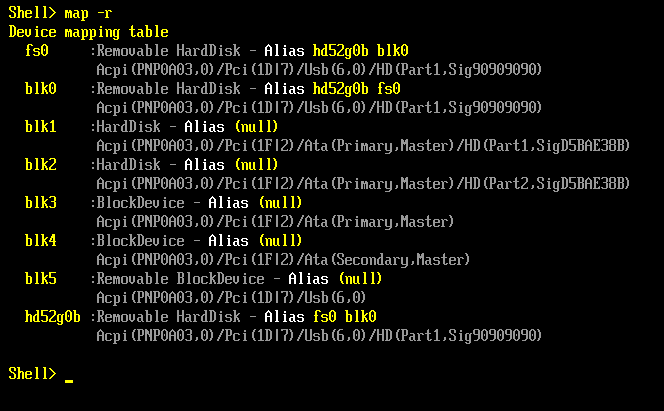
- If fs0: is still not listed, your pen drive may be faulty, you may need to try an alternative USB port, or you may even need to try a different model of pen drive.
Note: Generally most FAT16 or FAT32 formatted USB pen drives will work on servers in the EFI shell, even USB3 models on USB2.0 only servers. However, add-on USB3.0 controller cards (such as those added to some workstations) may not be detected in the EFI shell. Try the front USB ports first, and then try the system onboard rear ports second.
- Now select the USB pen drive by typing in fs0: and pressing Enter.
- You should now be able to list the contents of the pen drive by using the DIR command:
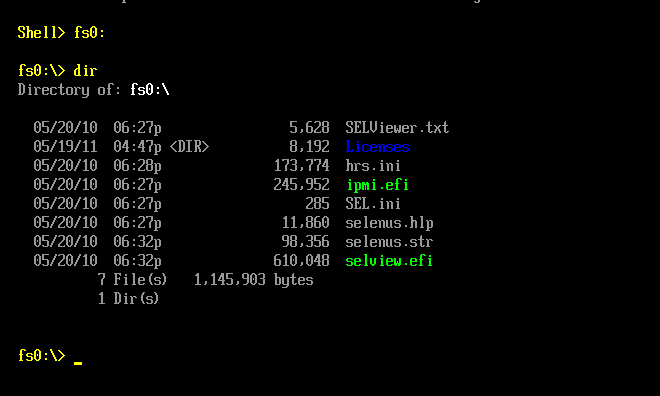
- Notice that folders are listed in blue and EFI executables (.EFI) are listed in green
- Some utilities also have .NSH files - these are scripts. For example, most Intel update utilities have a startup.nsh file which can be automatically executed on entering the shell.
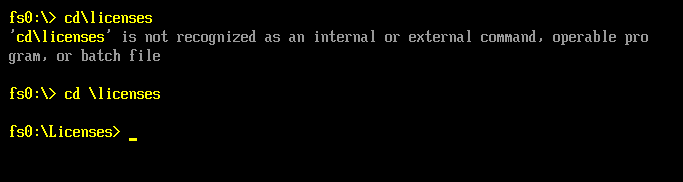
Tip: Just as in DOS, use the TAB key to help auto-complete filenames. For example, type in "CD " and then use the tab key to step through the filenames available in the current directory.
- Use the CD command as you would in DOS, to change directories. Its important to remember that you must put a space after the CD command.
Important: Some updates, such as RAID card firmware packages, will not run inside the EFI shell on older S5000 based systems. This is because these updates require EFI 2.0 which is not present on the S5000. In this instance, obtain the DOS version of the update and use a Windows 98SE DOS Bootable pen drive.
A seperate article wil cover using the SELVIEW utility in both EFI and Windows environments.
Applies to:
- All Stone / Intel based server systems.