Stone Computers Knowledgebase

Windows Deployment Services (WDS) May not Import Realtek LAN Drivers

Article ID: 441
Last updated: 13 Apr, 2017
Article ID: 441
Last updated: 13 Apr, 2017
Revision: 15
Views: 16534
Posted: 16 Mar, 2015
by Andrew Sharrad
Updated: 13 Apr, 2017
by Andrew Sharrad

Problem

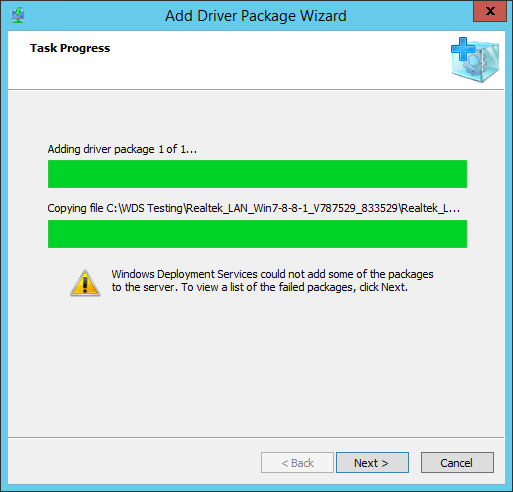
Newer versions of the Realtek LAN Driver, from around mid-2014 onwards, may fail to import into Windows Deployment Services, either WDS 2008R2 or WDS 2012.

WDS reports that the package addition failed. However, no actual error code or meaningful reason for the failure is displayed.

Cause

The root cause appears to be a problem with the WDS Jet Database and either the size of the Realtek LAN driver, or some particular information inside the driver INF. If you use the WDS Powershell utilities to try and import the driver an error code is return which indicates that a database error is being generated, with a record being "too big".

Resolution

Server 2012

There is one full resolution for this issue and three alternatives should your situation require it. However with the release of the April 2016 Realtek driver, only the full resolution should be required.

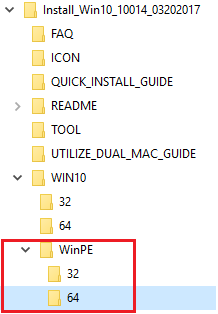
  • Obtain the April 2016 Realtek drivers or newer and use the drivers in the WinPE or WDS sub-folder. These drivers are also now available in our SCCM / WDS packs.

Server 2008R2

As of April 2017, some x64 versions of the Realtek driver, even the WinPE version, do not import into WDS for Server 2008R2. There is no resolution for this apart from upgrading your Server infrastructure or the work-arounds below.

Other Work-Arounds

  1. If using MDT, import the driver directly into MDT and then rebuild your Lite-Touch image.
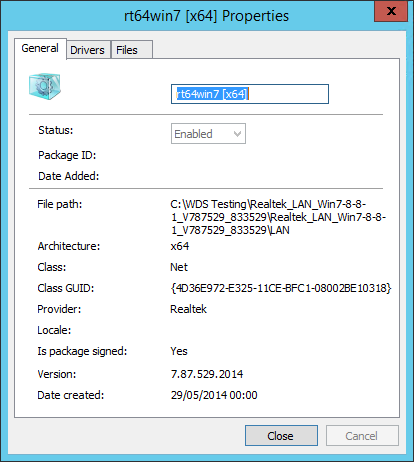
  2. Alternatively, if supported by the hardware you have, use an older version of the driver, such as this one from August 2013 for Windows 7.
  3. Or, manually add the driver to the boot WIM file manually for situations where you are capturing or deploying images.
  4. Finally, for network based installs, whilst you can add the driver to the boot WIM file, you could to manually deploy the Realtek LAN driver to the new installation. Note however that joining the machine to the network may not be possible until this has been done. This method is not suited to large deployments.

Overview of Adding a Driver to a WIM file

  1. Download and Install the latest Windows Assessment and Deployment Kit (ADK) to your PC. This can be installed on the WDS server however its not normally recommended, especially if the server is a domain controller. As of 13/4/17, the latest ADK is 1703 for Windows 10 (the Windows 8.1 Update ADK is here).
  2. Copy the boot WIM file to your ADK PC. Always keep a backup copy of the original WIM file.
  3. From the Deployment Tools command prompt, mount the WIM file to a folder. The destination folder must exist, and should be empty:

Imagex /mountrw "d:\wimwork\boot.wim" 1 d:\output

  1. Now add all of the drivers that you want. Put all of the drivers in a Drivers folder as below:

Dism /Image:d:\output /Add-Driver /Driver:d:\drivers /Recurse /ForceUnsigned

  1. (The /ForceUnsigned switch will allow all drivers to be added, whether signed or not).
  2. Now commit the changes back to the boot WIM file:

Imagex /unmount /commit d:\output

  1. Now you can copy the WIM file (d:\wimwork\boot.wim in the example) back to the WDS server and test to see if the driver addition was successful.

Note: Always ensure that the finished, built machine has the latest Realtek network driver on it, before handing it over to the user. The temporary 2013 Realtek network driver should not be left running on deployed machines.

Applies to:

  • All Stone desktop and laptop products with Realtek LAN adapters.

This article was:  
Article ID: 441
Last updated: 13 Apr, 2017
Revision: 15
Views: 16534
Posted: 16 Mar, 2015 by Andrew Sharrad
Updated: 13 Apr, 2017 by Andrew Sharrad
Also read