When to Use System Restore
System restore allows you to undo recent changes to the software of your Windows system. For example, you may have installed a new program or software driver and the system is now unreliable. You could use System Restore to roll back changes to an earlier point in time without losing your personal files, such as those stored in your Documents folder.
How to Use System Restore
- Open System Restore by clicking the Start button
.jpg) . In the search box, type System Restore, and then, in the list of results, click System Restore.
. In the search box, type System Restore, and then, in the list of results, click System Restore.
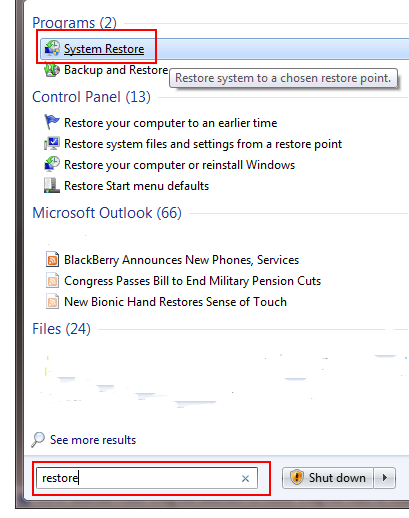
Fig 1. Start Menu.
- The next screen will show a Recommended restore point - choose this if the date is before you made the changes you want to reverse. Or, alternatively, for example if you want to go further back in time, then click "Choose a different restore point" then click on Next.

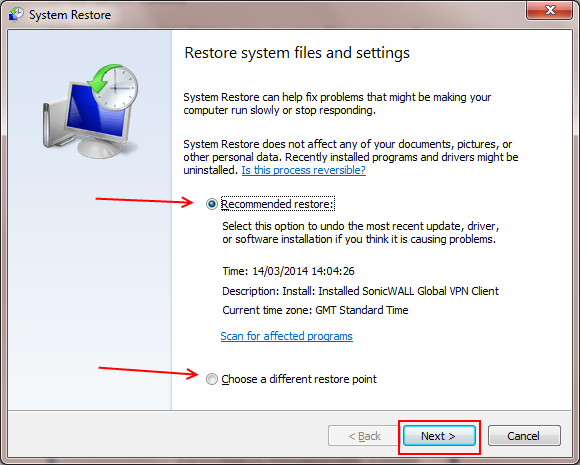
Fig 2. Recommended restore point
Recommended Restore
- If you selected the Recommended Restore point you will see a screen similar to the one below. Click on Finish.
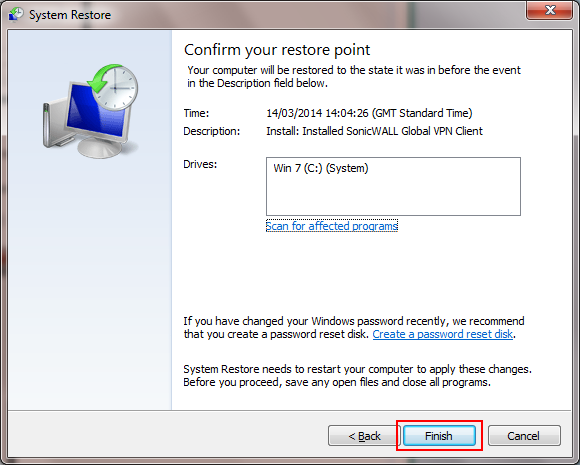
Fig 3. Recommended Restore Point
- You will now be asked to confirm if you want system restore to run. Select 'Yes' to confirm or if you do not want to proceed select 'No'.

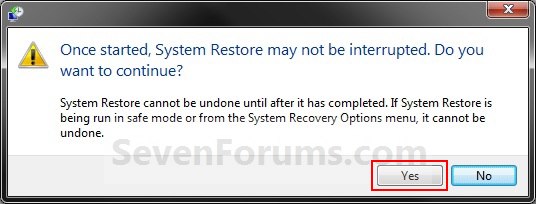
Fig 4. Yes or No
- System restore will now run. This can take a few minutes and the PC / notebook will restart. You will receive a confirmation message if the restoration was successful.
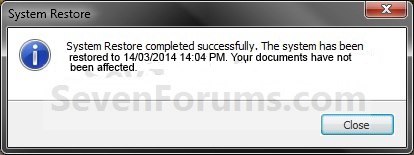
Fig 5. Reboot.
Using A Different Restore Point
- If you selected "Choose a different restore point" earlier then you will see a screen similar to the one below.
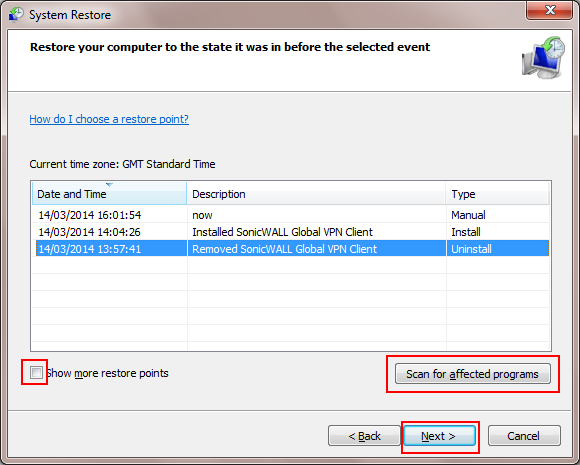
Fig 6. More restore points.
- Click on the date you want to restore to - you can check if there are any programs that will be affected by clicking on Scan for affected programs. When you are finished reviewing the programs (if any) please close the box.
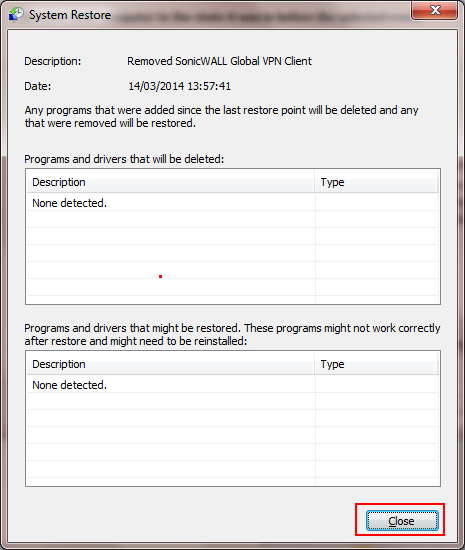
Fig 7. Affected programs.
- Either click on Next to run the System restore or to select another date tick Show more restore points and then click Next. Select the required date and click Next.
.png)
 Fig 8 Show more points.
What If System Restore is Turned Off?
If you have no restore points or System Restore is turned off you will receive the following screen:
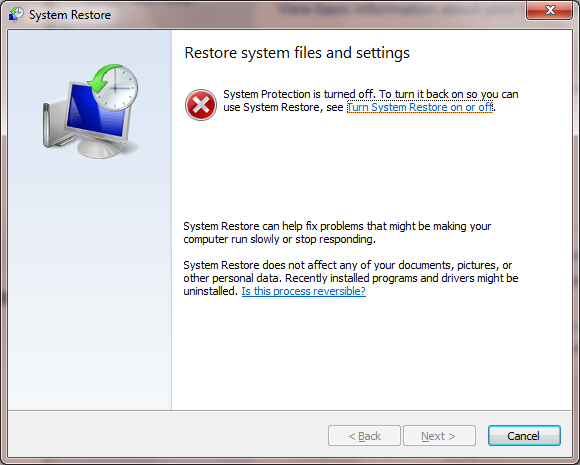
Fig 10 Restore off.
If System Restore is turned off you will not be able to restore to an earlier time. However you can turn on System Restore to track future changes to the machine and have the ability to undo these.
How to turn on System Restore
- Open the Start Menu, then right click on the Computer button and click on Properties.
- Click on the System Protection link as shown below.
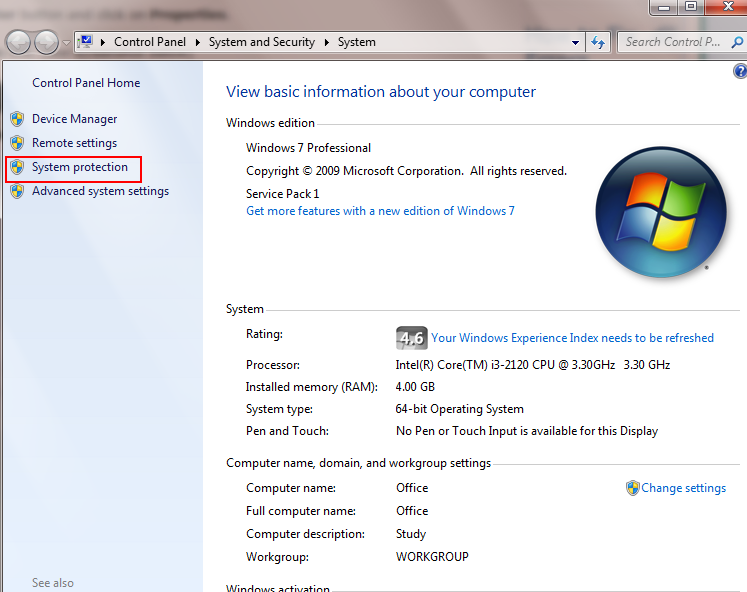
Fig 11. System Protection.
- Click on the available drive or partition that you want to turn System Restore on, to select it. (Normally the C: System drive) and then click on Configure.
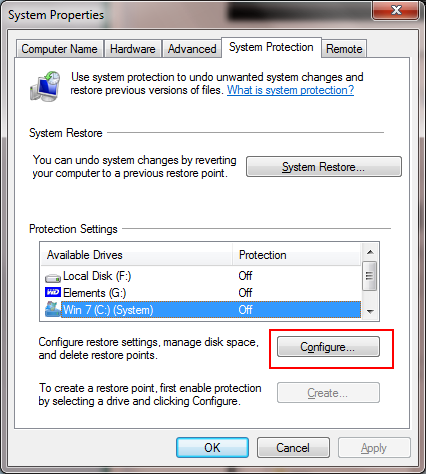
Fig 12. Configure Restore.
- Select Restore system settings and previous versions of files. Click Apply and then OK.
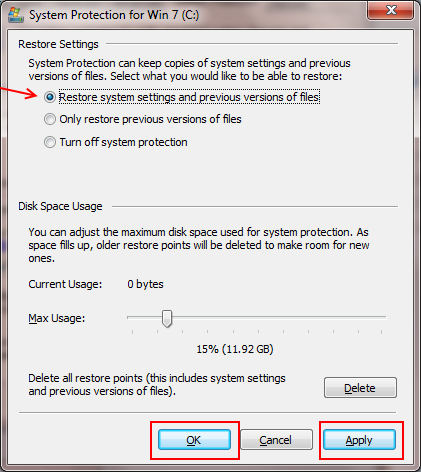
Fig 13. Apply restore
- You should now see the screen below showing Protection turned on. Click OK to finish.
.png)
Fig 14. Restore On.
Applies to:
- All systems running Windows 7
