Clearing the AMT Configuration or Settings
Intel Q Series desktop motherboards contain AMT functionality. AMT functionality and settings are not cleared by resetting the main CMOS by loading BIOS defaults. Intel B series boards can also have AMT functionality and again the AMT settings are not cleared by resetting the main CMOS by loading BIOS defaults.
To clear the AMT settings, either perform a full manual settings clear or using the dedicated MEBX (Management Engine BIOS Extension) Reset Jumper.
Using the MEBX Reset Jumper (the recommended method)
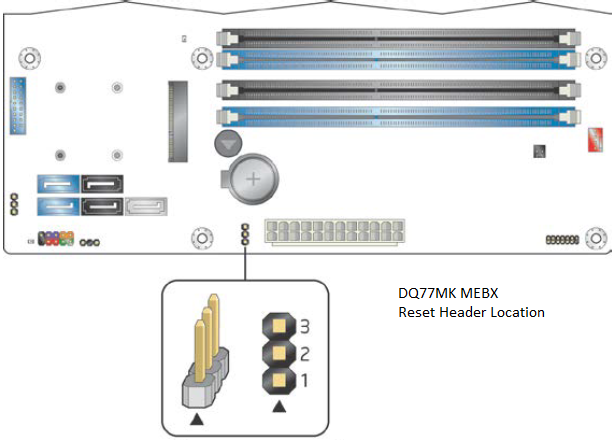
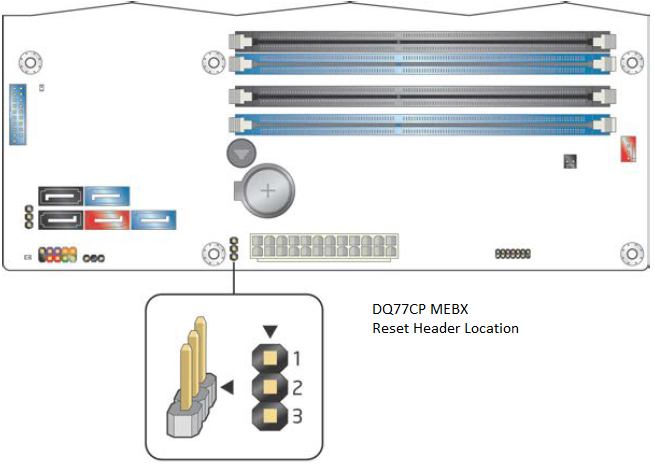
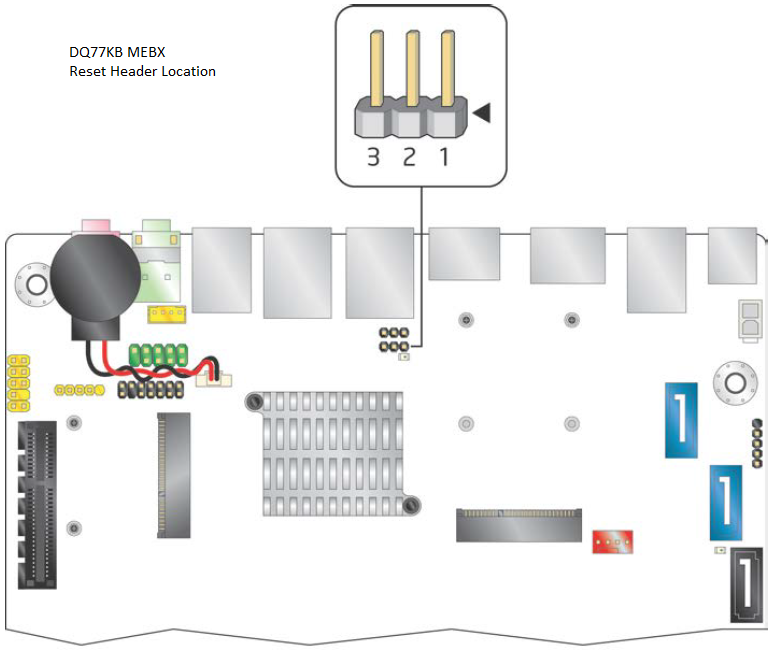
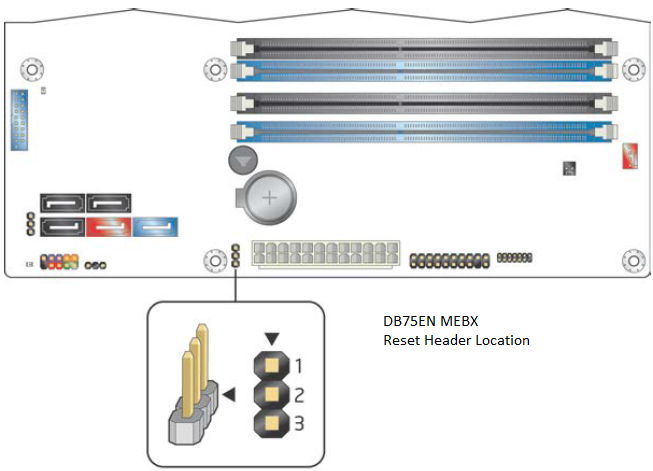
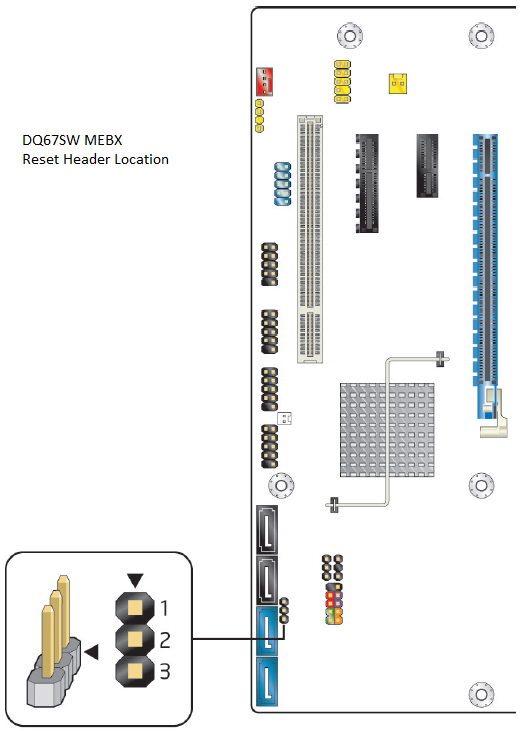
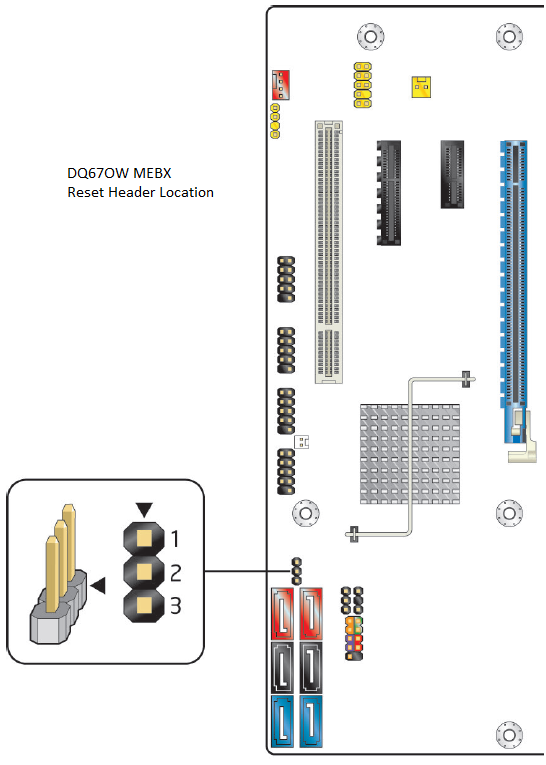
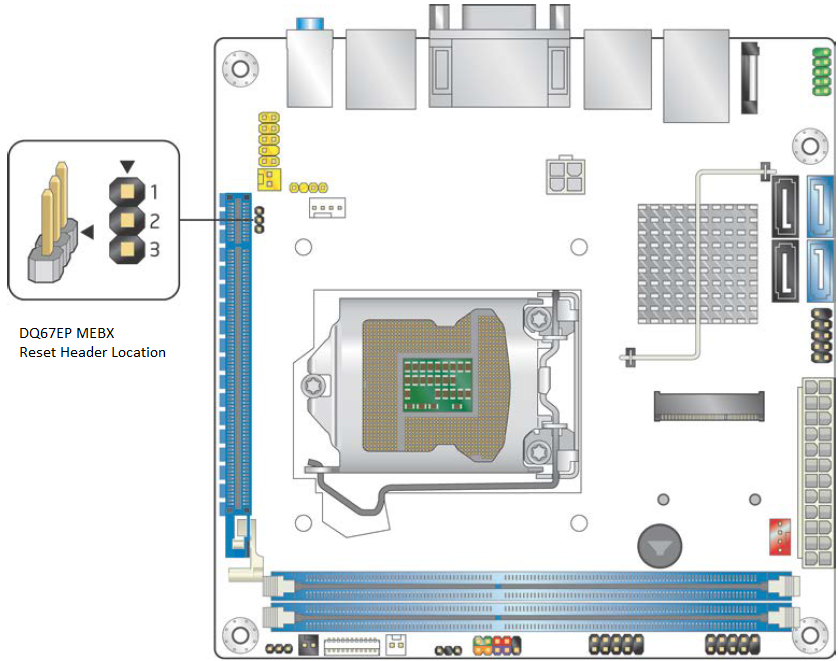
- Locate the MEBX Reset Header (see diagrams below).
- Shut the system down and disconnect the AC mains.
- Short pins 1 and 2 of the header together for 5 seconds.
- Reconnect the AC mains.
- Test that the password has been cleared.
Location of the header - DQ77MK:
Location of the header - DQ77CP:
Location of the header - DQ77KB:
Location of the header - DB75EN:
Location of the header - DQ67SW:
Location of the header - DQ67OW:
Location of the header - DQ67EP:
Note: Do not leave the AC mains connected whilst shorting the MEBX reset header. Do not have the system switched on whilst shorting the MEBX header as you may damage the motherboard.
Main Full Settings Clear (alternative method)
- Disconnect the AC mains.
- Remove the CMOS battery.
- Short the battery terminals on the motherboard together for at least 10 seconds.
- Reinstall the CMOS battery, observing the correct polarity.
- Reconnect the AC mains.
- Test the system.
After clearing the settings using either method, the AMT default password of admin should be restored.
Applies to:
- Intel Q67 Series desktop motherboards (DQ67SW, DQ67OW, DQ67EP)
- Intel Q77 Series desktop motherboards (DQ77MK, DQ77CP, DQ77KB)
- Intel B75 Series desktop motherboard (DB75EN)