Instructions for the Windows Based Selviewer Tool
The Windows based Selviewer does not normally require rebooting to get the hardware log files, making it a useful tool. The instructions below are a guide as there are different versions of the Windows Selview tool and some of them look slightly different, or the filenames may vary.
Tip: In addition to the SEL Viewer utilities for EFI or Windows, the S1400, S1600, S2400 and S2600 range of boards and systems from Intel now also support the SysInfo tool. The Sysinfo tool works in a very similar way but records even more information, at the cost of taking slighly longer to run.
Main Components
- IPMI driver which needs to be installed (some systems may have a Microsoft IPMI driver already installed in Device Manager, in which case you can use Device Manager to update the IPMI driver by pointing it to the Intel files)
- Some versions of Selviewer need Java to be installed but only if you want to run the full interface. If you just want to save events using the command line, you don't need Java. (look at the download page for your platform to see if you might need Java)
- The Selviewer tool itself
Quick Instructions - No User interface (recommended for System Admins or experienced users)
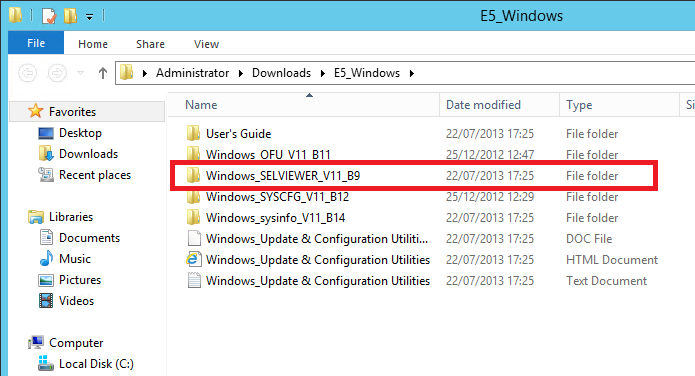
1. Download the Windows Based SELVIEWER Tool for your platform and extract it.
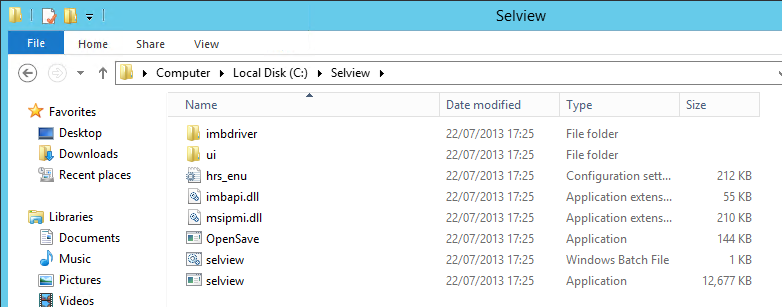
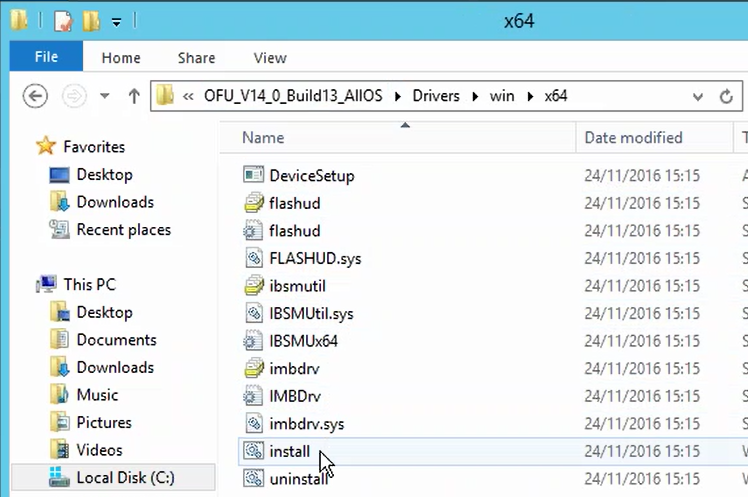
2. Go into the extracted Selview folder, and then into the x64 or x86 subfolder, depending on your operating system. Copy the contents of this x86 or x64 folder to C:\SELVIEW or another easy to type location.
You should end up with the following:
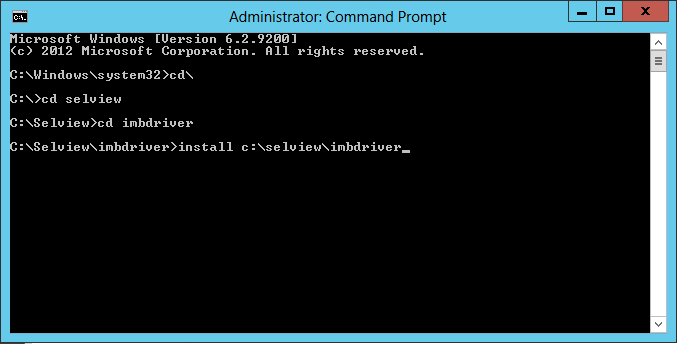
3. Open an Administrative command prompt and use the CD command to go to C:\SELVIEW\IMBDRIVER
4. Install the IPMI driver, usually using the command INSTALL C:\SELVIEW\IMBDRIVER
5. Some version of Selviewer require Java if you plan to use the full interface. As these instructions cover quick usage without the user interface, Java is not required to be installed.
6. Using the Administrative command prompt, go to the folder containing Selview.EXE (use the corresponding sub-folder x86 or x64 depending on if your operating system is 32-bit or 64-bit).
7. Run SELVIEW.EXE sn.sel /save to save a copy of the events.
8. Send the output file to Stone support for review or alternatively use Wordpad or Notepad to examine them.
Tip: If dealing with multiple servers, call the output file a different name - its recommended you use the server serial number.
Short Instructions - Full Selview with User Interface
1. Download the Windows Based SELVIEWER Tool for your platform and extract it.
2. Go into the extracted Selview folder, and then into the x64 or x86 subfolder, depending on your operating system. Copy the contents of this x86 or x64 folder to C:\SELVIEW or another easy to type location.
You should end up with the following:
3. Open an Administrative command prompt and use the CD command to go to C:\SELVIEW\IMBDRIVER
4. Install the IPMI driver, usually using the command INSTALL C:\SELVIEW\IMBDRIVER
5. Install Java if your version of Selviewer requires it (you can also always tell this by seeing some .JAR files in the UI directory).
6. Run the SELVIEW.EXE file, or the batch file (using the version which matches the edition of Java you installed (32bit or 64bit), if your Selviewer needs Java. For example run the x86\SELVIEW.EXE program if you have 32-bit Java installed or the x64\SELVIEW.EXE program if you have 64-bt Java installed.). You will need to run these as an Administrator.
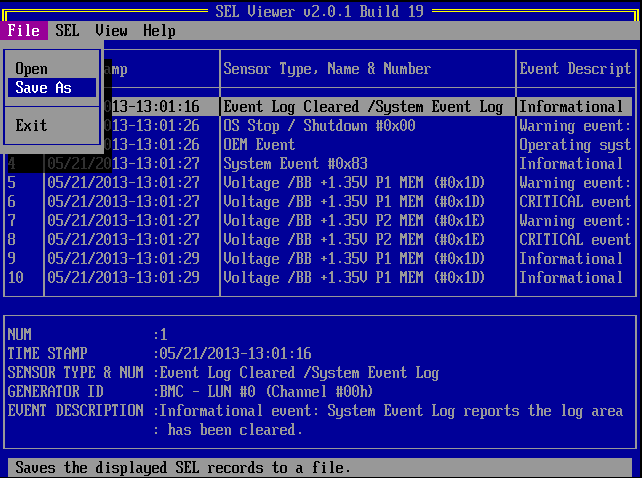
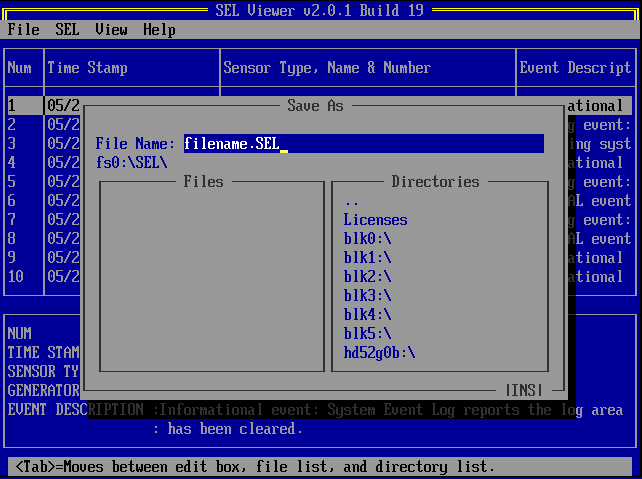
7. Use the File > Save As option within the program to save a copy of the events, which you can then send to Stone for Analysis. You can also use Wordpad or Notepad to open them.
Note: If the Selviewer program crashes when you run it, follow the instructions in the
troubleshooting secion.
Detailed Instructions - Full Selview with User Interface
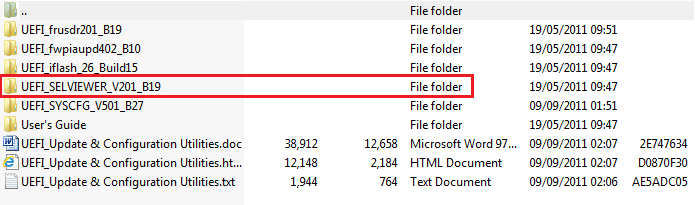
1. Download the Windows Based SELVIEWER Tool for your platform. This package normally comes with several utilities bundled inside, including the Selviewer tool.
2. Extract the downloaded file into a subfolder. Sample below.
3. If you are running a 64-bit system (most likely) go into the x64 subdirectory. If you are running a 32-bit system, go into the x86 subdirectory. This is important as the edition of the IPMI driver must match your operating system (32-bit or 64-bit).
4. Then copy the IMBDriver subdirectory by right hand clicking on it, then left hand click on Copy
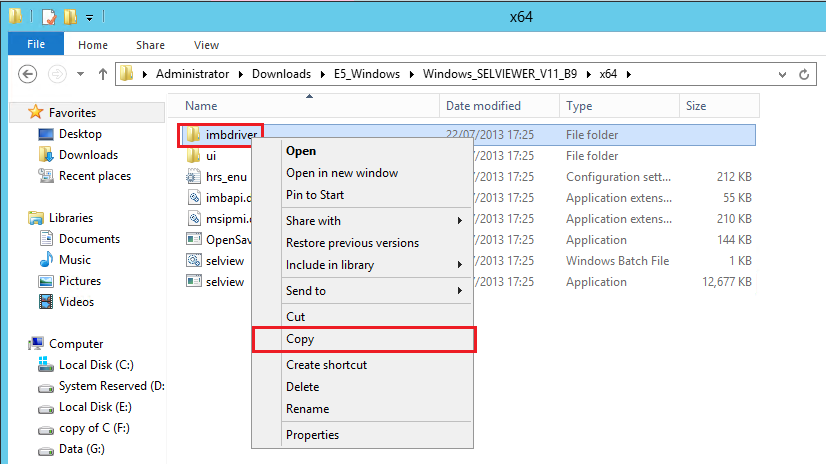
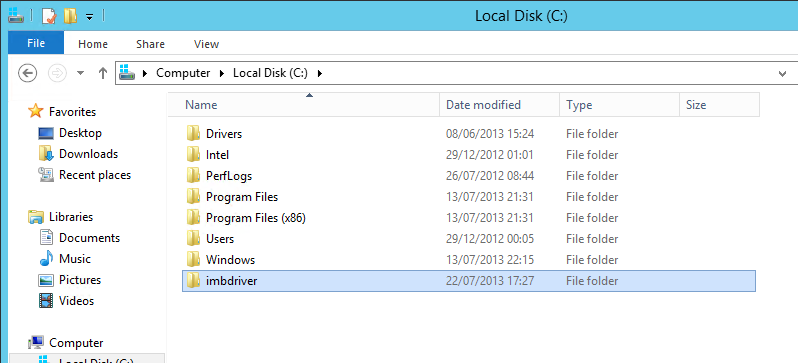
5. Paste the copied folder to the root of the C drive, i.e. C:\
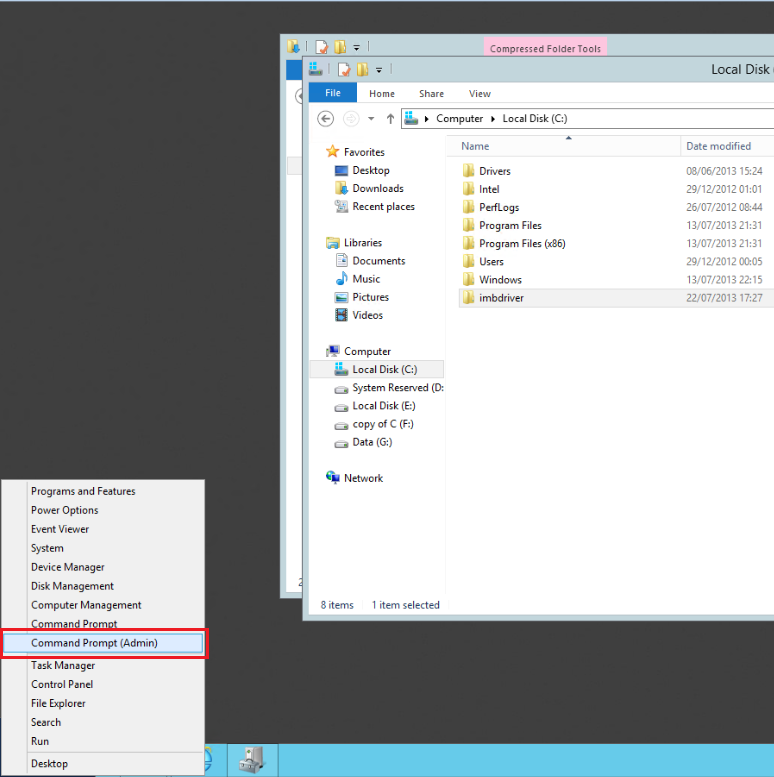
6. Open an Administrative Command prompt
The quickest way to do this on Server 2012 is to move the mouse cursor to the far bottom left of the screen, and then the Start image comes up, right hand click on it. Then choose Command Prompt (Admin).
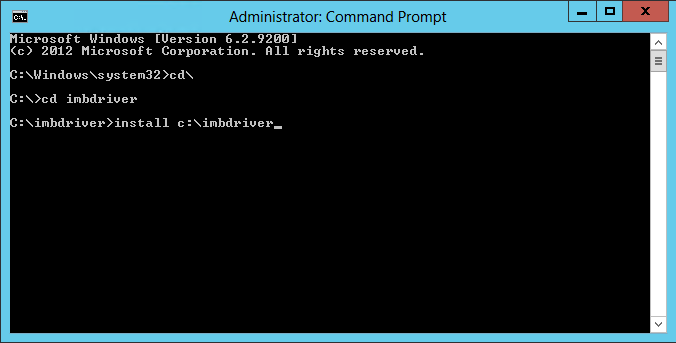
7. Inside the command prompt, change to the folder containing the IPMI driver, by using the CD command. For example:
CD \
CD \IMBDRIVER
8. Then run the device driver installer:
INSTALL C:\IMBDRIVER
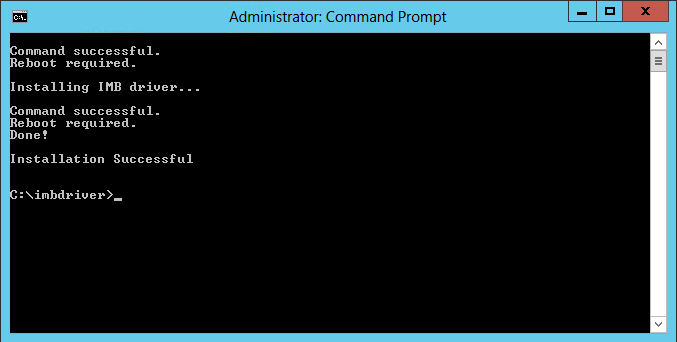
9.This should then report that the installation was successful. Note that in most instances a reboot is not actually required.
10. Go back to the files you extracted earlier.
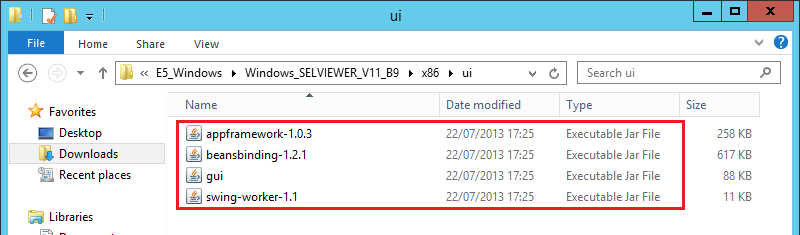
11. If your version of Selview requires Java, this will need to be installed first. You can double check if Java is required by checking for the presence of .JAR files in the UI subfolder.
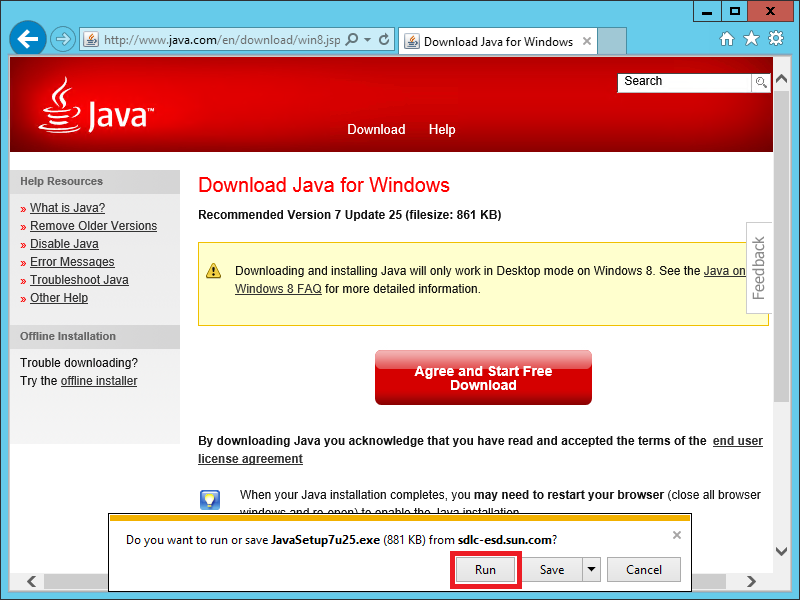
12. If required, Install Java. If not required, skip to step 13.
You will get either 32-bit or 64-bit Java depending on whether or not you are using a 32-bit or 64-bit browser to browse the internet. (64-bit browsers will require a 64-bit operating system).
It is important to note or realise which version of Java is being installed as you will need to use the matching Selviewer program. (While the IPMI driver needs to match your operating system, the Selviewer program needs to match the Java edition you have installed).
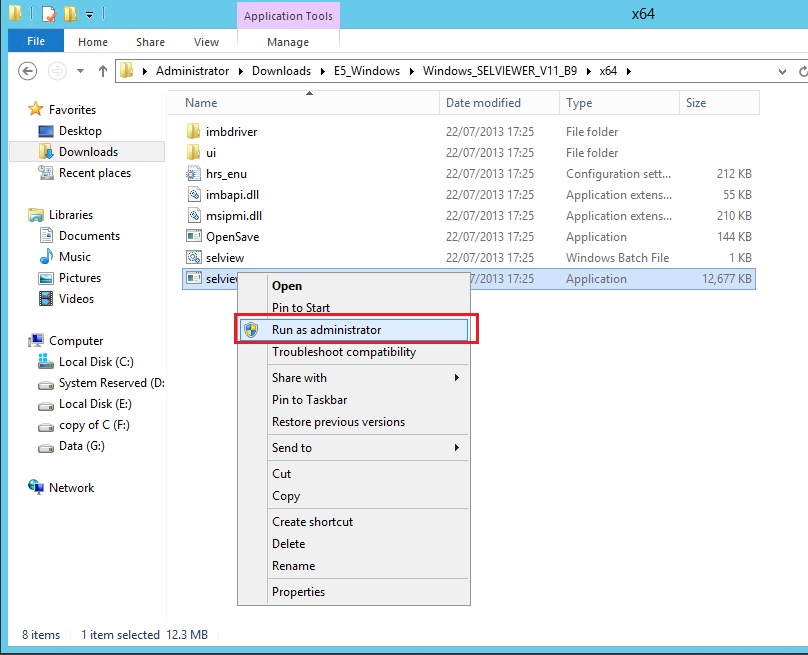
13. Now run the Selviewer application.
If your Selviewer doesnt require Java, then choose the version from the x86 or x64 folder which matches your operating system.
Right hand click on the Application and choose Run as Administrator.
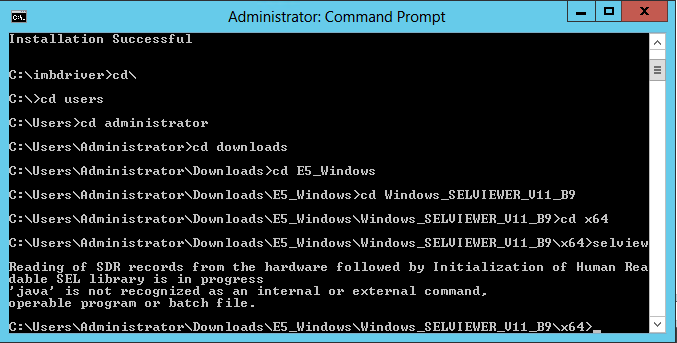
14. If the Selviewer interface doesnt run, try running the batch file by using the Administrative command prompt; change to the location containing the files and run Selview. You should get an error message indicating the problem. For example, in the screenshot below, Java is not installed:
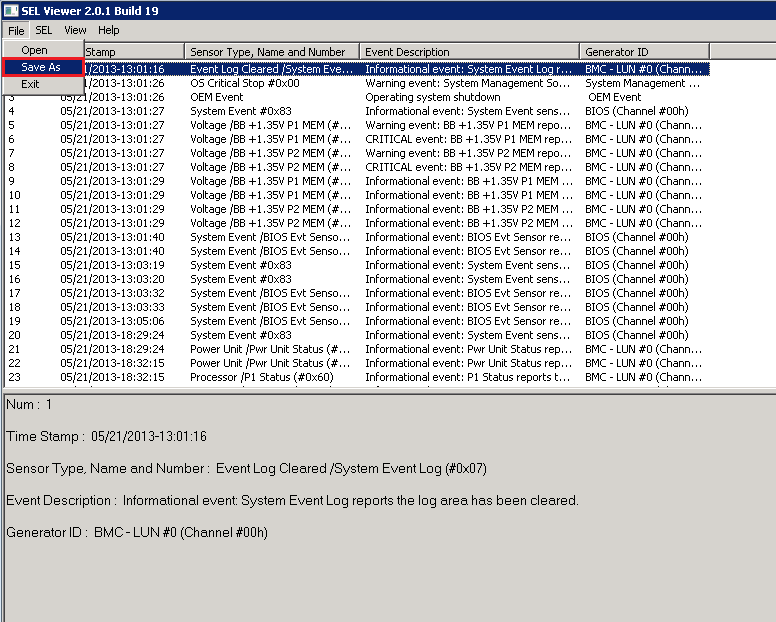
15. When the Selviewer interface has loaded, use the File and then Save As option to save the events to a file.
16. Send the event log file to Stone for analysis. You can also use Wordpad or Notepad to examine the file.
If the Selviewer program crashes when you run it, follow the instructions in the troubleshooting secion.
Reminder: If you install the Windows 64-bit version on a 64-bit capable system but the SEL viewer fails to run, it may be because you either dont have any Java installed, or you only have 32-bit Java installed. It is possible to install the 64-bit IPMI driver and then use the 32-bit SELVIEWER utility with 32-bit Java installed.
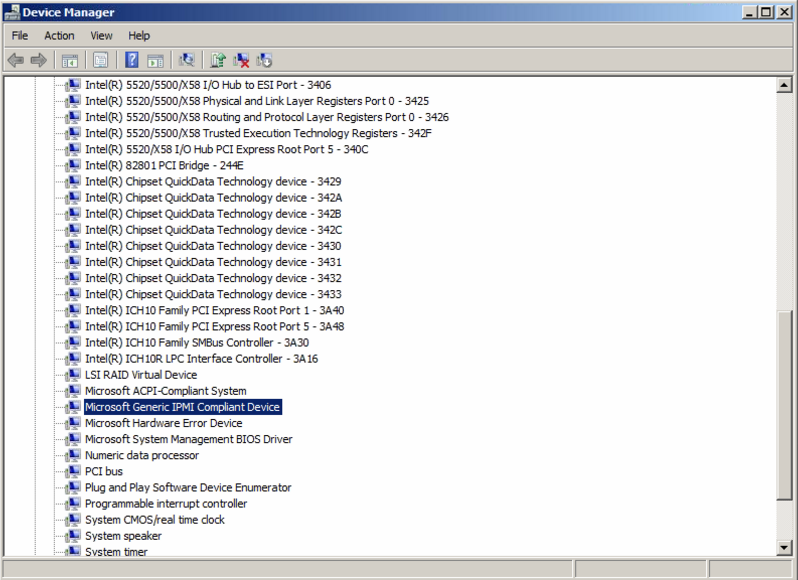
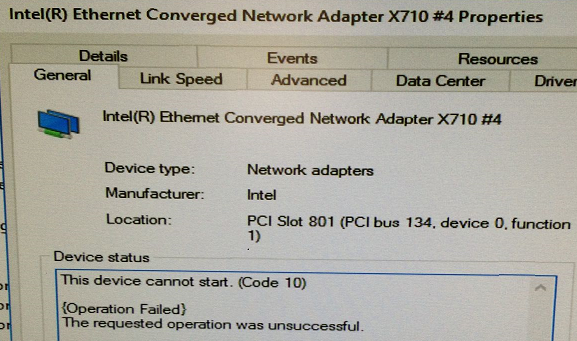
If the Selviewer program crashes or stops responding when you run it, the problem is likely to be around the IPMI driver. Check Device Manager for the presence of a Microsoft IPMI driver or an older Intel IPMI driver. If it exists, you will need to use Device Manager to manually upgrade the driver to the Intel version contained in the SELVIEWER package.
Re-running the "install" program for the IPMI driver will not solve the problem as this may not over-write an existing Microsoft IPMI driver.
Applies to:
- Server products that support SEL storage and retrieval

.PNG)


.png)