Using a Hot-Spare
A Hot-Spare helps ensure RAID system reliability and uptime. It gives the RAID controller a drive that can be automatically used to rebuild RAID data in the event of another drive problem or failure.
If you have a RAID5 system, consider migrating to RAID6 instead of simply assigning a hot-spare. This provides additional reliability as a second set of parity information is available. There are instances where this is not practical - for example, if your system includes two RAID5 arrays, or perhaps a RAID5 or a RAID1 and the number of additional drives you can fit is limited. In this instance, if you can only fit one additional drive, the use of a Global hot-spare is recommended.
The instructions below are based on a system with an Intel or LSI hardware RAID controller or module, and the Intel RAID Web Console 2 (RWC 2) or LSI MegaRAID Storage Manager (MSM).
Tip: If you have recently replaced a failed hard drive and the RAID array has not automatically started the rebuild process, follow the instructions below. This is likely to happen on an Intel SRCSASRB or Intel SRCSATAWB controller as these do not automatically rebuild onto unassigned drives unless configured to do so.
Steps
Windows
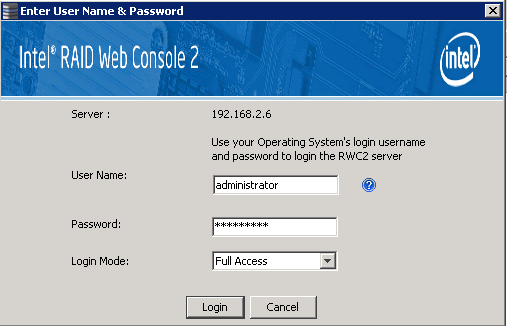
- Login to RWC2 / MSM (use your Windows Administrator or Domain Administrator password to do this)
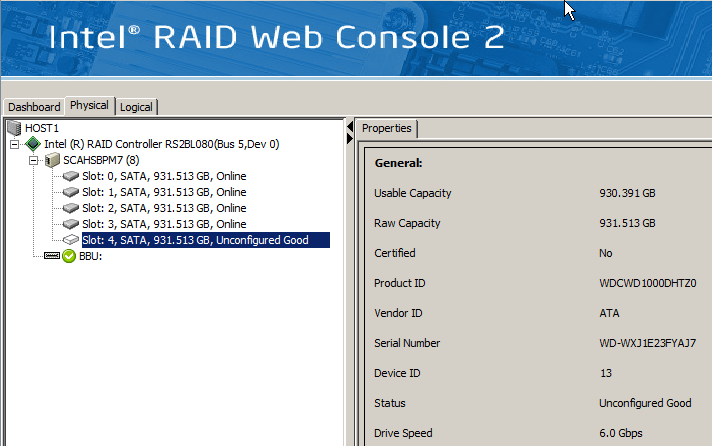
- Go to the Physical Tab
- Confirm the slot which is available for fitting a spare drive (slots are usually numbered from 0, starting from the bottom left of the chassis, numbered going up, then across from left to right). If unsure, check with Stone Support.
Typical Drive Slot Layout
| 2 |
5 |
8 |
11 |
| 1 |
4 |
7 |
10 |
| 0 |
3 |
6 |
9 |
- Fit the spare drive.
- Check that the drive is recognised in the Physical drive list.
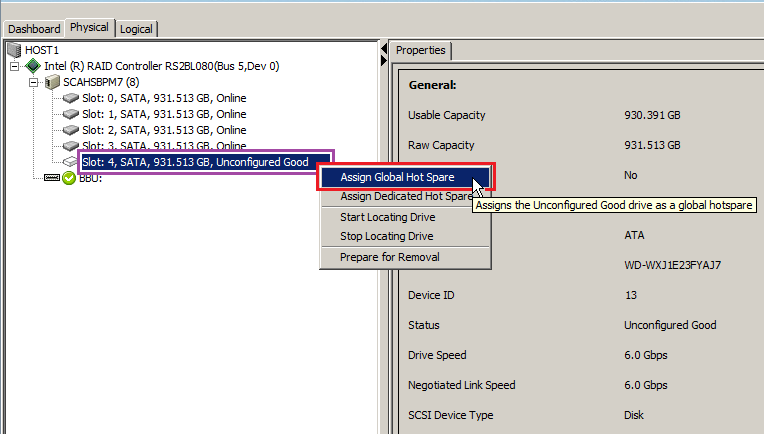
- Right hand click on the drive. You can then assign the drive as a global hot-spare (suitable for most situations) or dedicate the drive as a hot-spare for a specific virtual drive.
RAID BIOS
These instructions assume that you have already fitted the hot-spare drive and have rebooted the system to do so, hence performing the configuration using the RAID BIOS. If your system isn't running Windows you can also use this method to perform the configuration; if you are running VMWare consider setting up your VMWare hosts for Remote RAID Web Console configuration.
Steps:
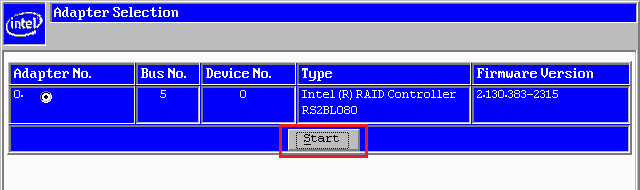
- Enter the RAID BIOS when prompted (usually CTRL+G on Intel controllers or CTRL+H on LSI controllers)
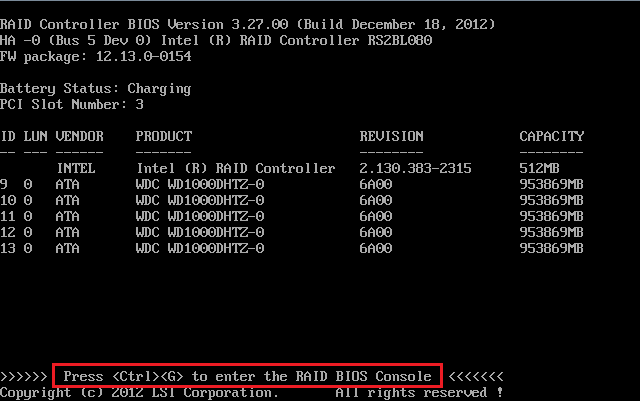
- Press Start (after selecting the right adapter if you have more than one adapter in the system).
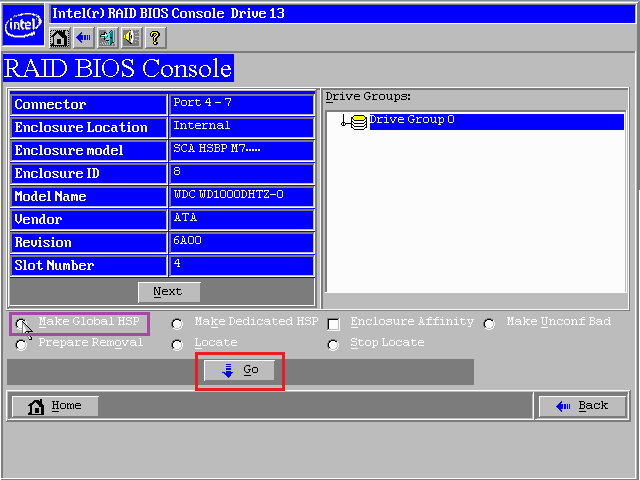
- The system should immediately go into the Logical View, allowing you to see the Physical drives.
- Under Logical view, find the Unconfigured drive - normally marked in blue, and then click on it.

- Then you can use "Make Global HSP" to turn the drive into a global hot-spare, or "Make Dedicate HSP" to dedicate the drive to an array.
- Once you have selected the radio button, click on Go to make the change.
Applies to:
- Systems with an Intel or LSI Hardware RAID Controller or Module.