Problem
- Your network printers deployed via Group Policy or the Print Management Console no longer work.
- The printer drivers do not seem to be being pushed out or deployed.
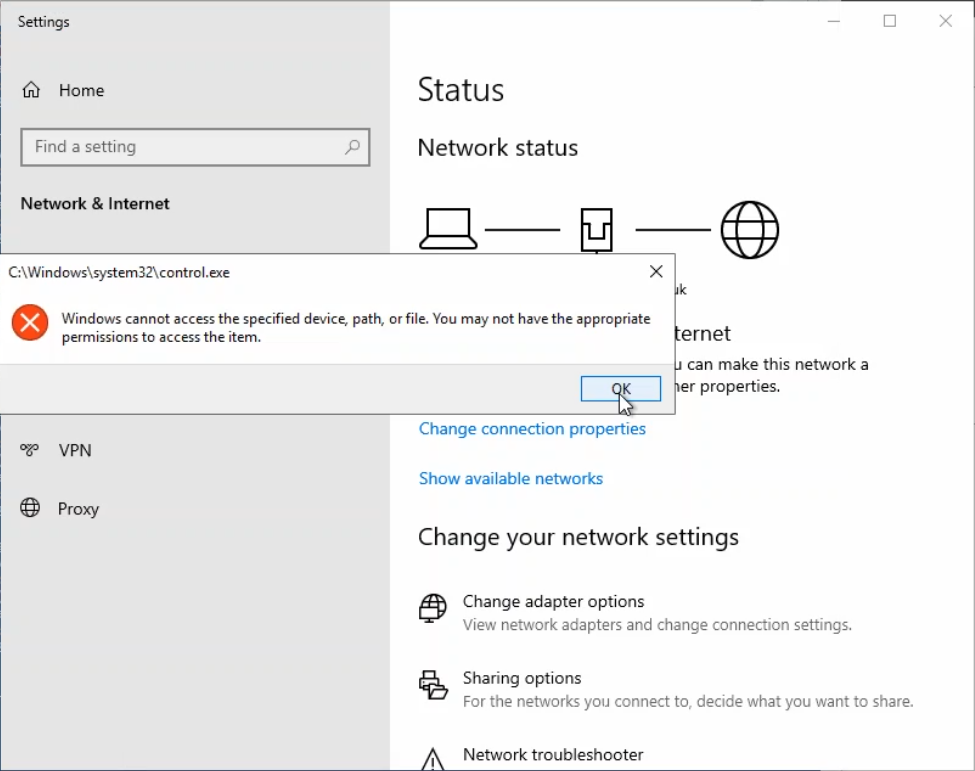
- If you use a Printer Login script, this doesn't deploy the printers either. It may give you a blank screen and pause on login, or a prompt for Administrator credentials.
Scenario
You had a working print environment with deployed network printers which stopped working after you applied Windows Updates to your Print Server on or after 12/7/2016.
End user devices that were reimaged after this time are more prone to the issue as they are less likely to have the required Print driver installed.
Cause
Microsoft Windows Update KB3170455 has changed the security associated with Print Servers. Print Servers will now normally only automatically be able to supply printer drivers to end user devices if the printer driver has a signed print driver package, normally supplied in a .CAB file.
Resolution
There are three potential resolutions to this issue:
- Replace your printer drivers on the print server with new, digitally signed "packaged" versions.
- Uninstall KB3170455 from your print server, and then reboot it. Ensure that this update is not automatically reinstalled.
- Install the Microsoft Mitigation Update, here - see "Oct 2016 Update: Mitigation for known issues".
- Use the work-around below. This is most useful when you cannot obtain updated printer drivers, perhaps for an older device, and does not require changes to the client PCs.
Work Around
This involves changing the PrinterDriverAttributes registry entry per driver to allow Windows to use it as before. The entry tells Windows that the driver is a signed package, even if it is not.
Instructions
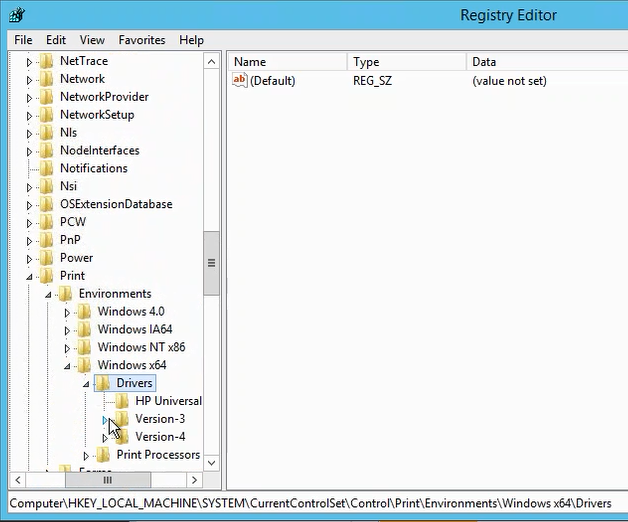
- Open Registry Editor on the Print Server.
- Browse to HKEY_Local_Machine\System\CurrentControlSet\Control\Print\Environments
- Then go into either Windows x64 or Windows NT x86, depending whether is is a 64-bit or 32-bit print driver your are deploying or having problems with.
- Look at all of the Printer drivers in the Version-3 and Version -4 subkeys. Version-3 printer drivers are most likely to be affected by this issue.
- Examine the PrinterDriverAttributes setting for the driver.
- For example, the Oki5600 driver below.
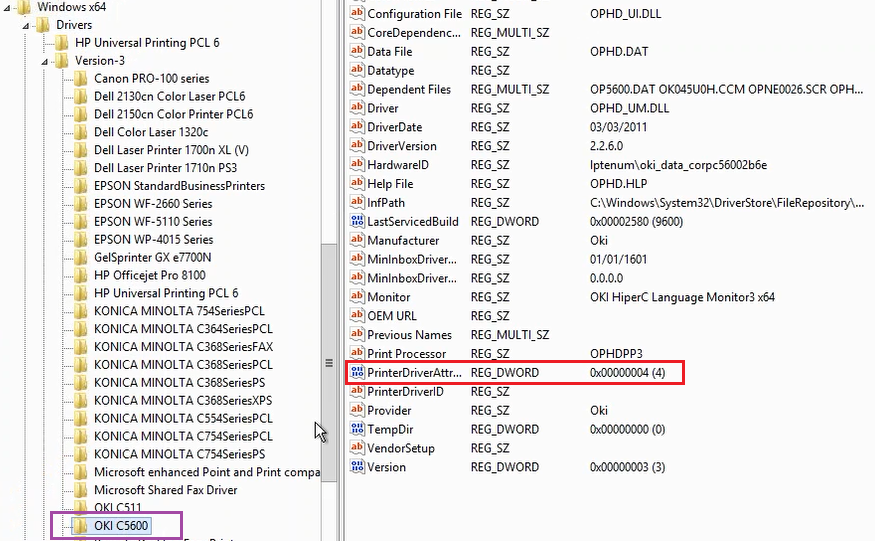
- The PrinterDriverAttributes value is a hexadecimal number. It must be an odd number to present the "flag" that the print driver is suitable for distribution, i.e. that it is a signed package.
- Change the Printer attribute to be an odd number - this normally means adding 1 to it.
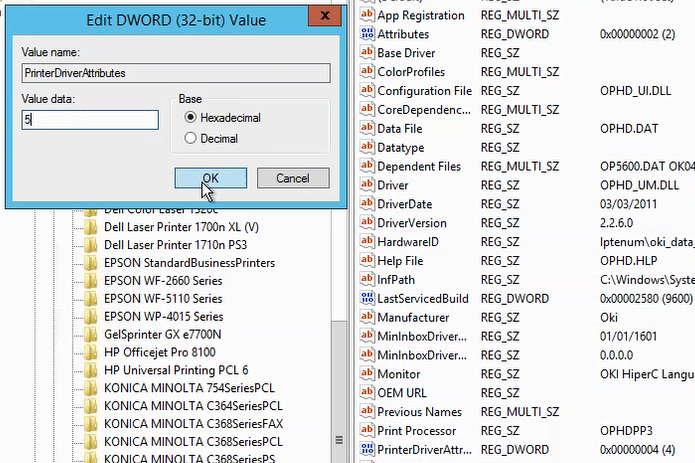
- When you have finished editing the registry, restart the print server.
- Test to see if the change has made the improvement required.
What If its a Hexadecimal number?
Use the table below to guide you in changing the PrinterDriverAttributes value.
| Last Digital - Old Value | Last Digit - New Value |
| 0 | 1 |
| 1 | No Change |
| 2 | 3 |
| 3 | No Change |
| 4 | 5 |
| 5 | No Change |
| 6 | 7 |
| 7 | No Change |
| 8 | 9 |
| 9 | No Change |
| a | b |
| b | No Change |
| c | d |
| d | No Change |
| e | f |
| f | No change |
Applies to:
- Clients using Print services host on Windows Server 2008R2 or Windows Server 2012