Installation, Drivers and Software

Stone NT310-H User Manual and Hotkeys

Stone NT310-H (W550SU1)

Please find attached the Stone NT310-H (W550SU1) User Manual.

Function Keys / Hotkeys

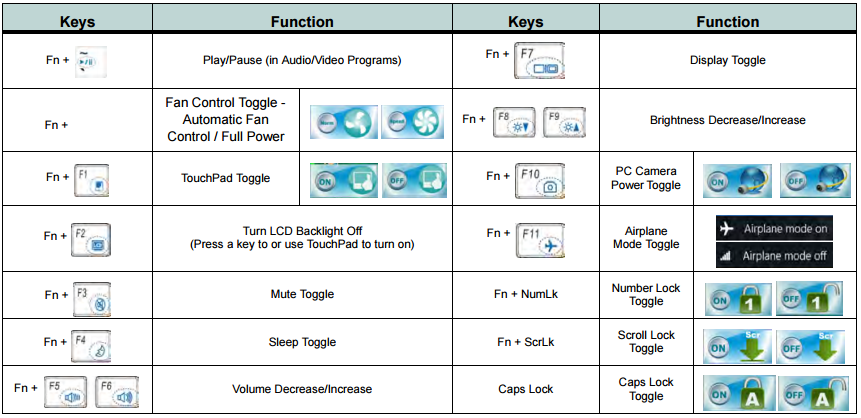
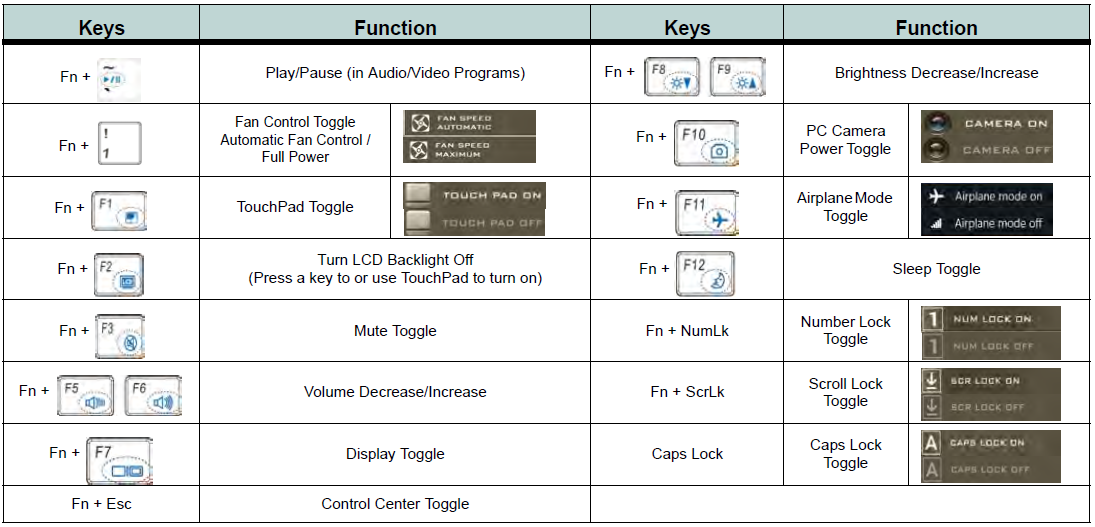
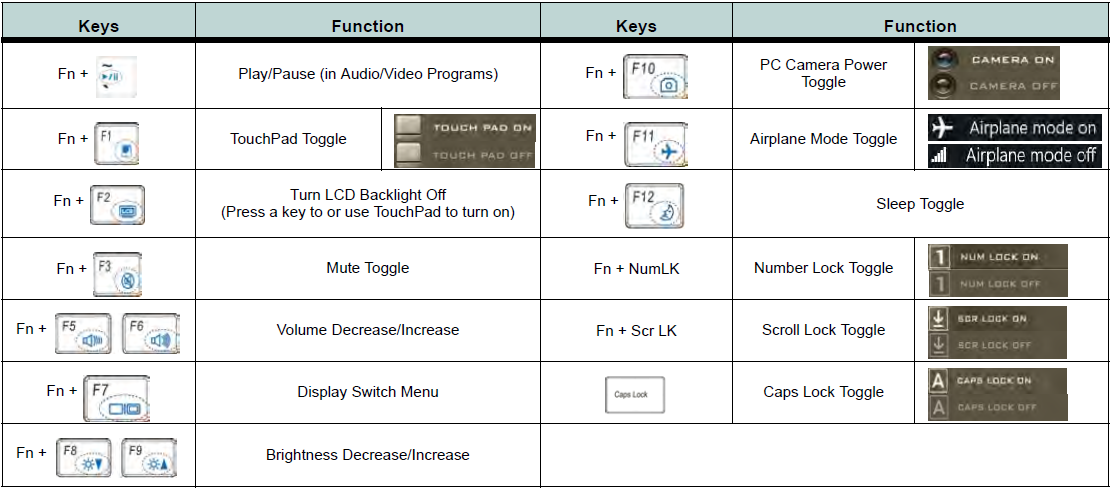
The function keys will act as hotkeys when pressed whilst the FN key is held down. Some key combinations will also generate an on screen message when the Hotkey utility is installed.

Applies to:


Stone Classmate 3 User Manual

Stone Classmate 3 (TL10IE1)

Please find attached the Stone Classmate 3 (TL10IE1) User Manual.

Applies to:


How to perform a BIOS update in Windows on Stone notebooks with an Insyde BIOS

Process

Note: Ensure the notebook is plugged into the AC adapter before proceeding with any EC or BIOS update.

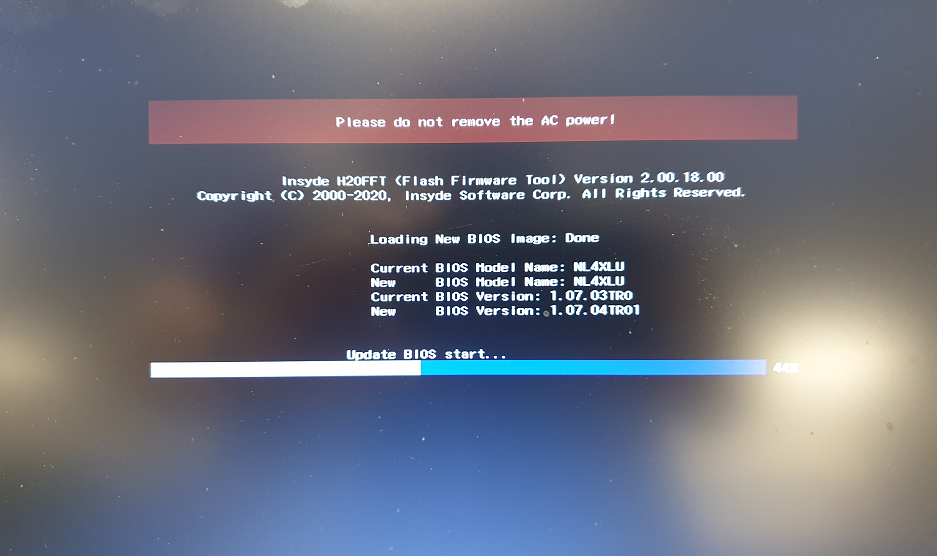
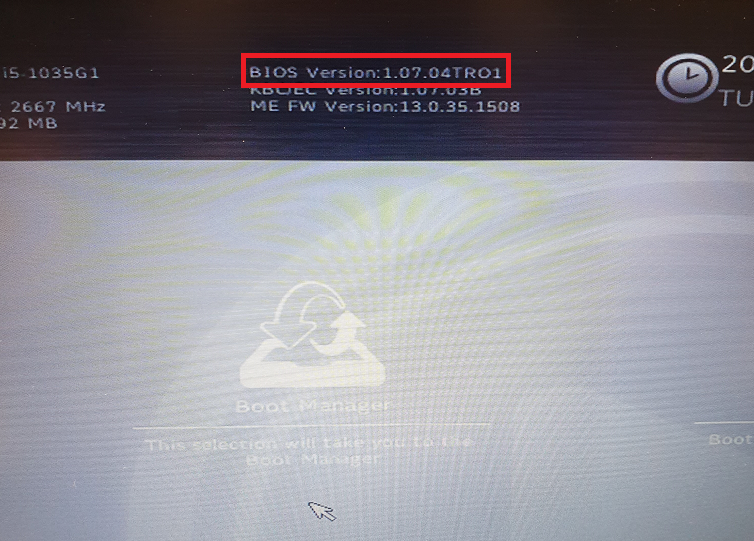
In this example, we're updating a Stonebook Lite L105B BIOS from 1.07.03 to 1.07.04TRO

Download and extract the relevant BIOS files, then locate the Insyde BIOS updater application, highlighted below.

Open the application and you will get the following prompt.

Click on OK and the notebook will reboot and begin the BIOS update process. 

Note: You cannot use the keyboard whilst performing the update!

Once complete the notebook will turn off. When turning the machine back on it will take up to 30 seconds to POST. Once on enter the BIOS and check it has updated correctly.

Applies to:


Stone NT310 User Manual

Stone NT310 (W550EU)

Please find attached the Stone NT310 (W550EU) User Manual.

Manual Errata: The manual preface page II refers to compliance to EuP standards for standby and off-mode. The NT310 is compliant with the updated ErP standard for standby and off-mode with the power draw in these states as 0.5W or less.

Applies to:


Stone Classmate 4 User Manual

Stone Classmate 4 (TL10RE1)

Please find attached the Stone Classmate 4 (TL10RE1) User Manual.

Applies to:


Where is my Windows 8 Product Key or COA?

Where is the Product Key?

Microsoft made an improvement to its activation process in Windows 8 meaning all machines built with this operating system installed no longer have a COA label affixed to them. A digital key is incorporated into the BIOS of the machine by Stone Computers in the factory.

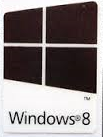
You can still see that your machine is licensed for Windows 8 by the small logo label, usually affixed underneath your machine if your machine is a notebook.

Windows 8 Label

Apples to:


Removing the Intel Graphics Tray Icon and Hotkey Program as Part of a Deployment

Scenerio

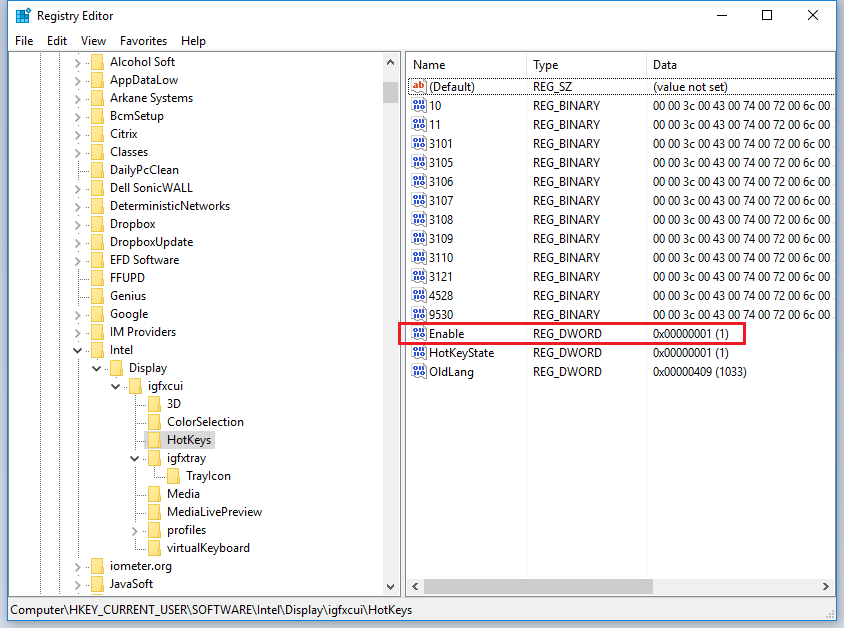
When you Install the Intel HD Graphics Driver, the Intel tray Icon and Hotkey program are installed by default. In some situations it is advantageous to remove these programs, for example, to prevent users accidentally rotating the screen.

How this Can Be Done

This can be done by manually by making registry changes to the system. There are two methods available, and old and a new method which will depend upon the age of the Intel HD Graphics driver you have installed.

New Method

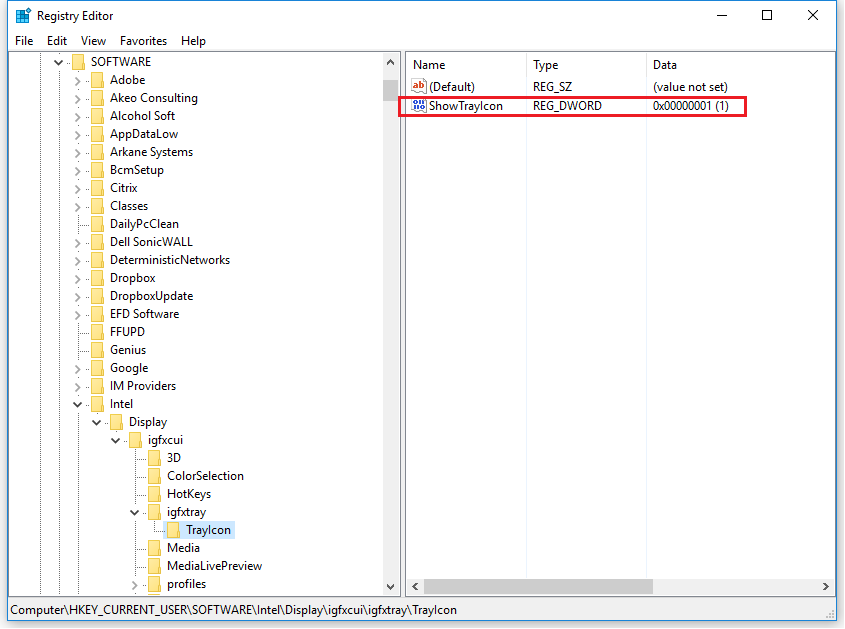
Check for a Registry entry under HKEY_CURRENT_USER\Software\Intel\Display\igfxcui\igfxtray\TrayIcon > ShowTrayIcon.

Note: As this is a per-user setting, as part of a managed deployment you may wish to deploy this registry change as a user group policy preference. This is the easiest way to push out this setting.

Old Method

Check the for the presence of the key IgfxTray under HKEY_LOCAL_MACHINE\SOFTWARE\Microsoft\Windows\CurrentVersion\Run. If you have this key and the above method does not work, then it is likely that you have an older Intel display driver. If you have an older driver, you will need to remove the three keys below to prevent the tray icon from appearing.

HKEY_LOCAL_MACHINE\SOFTWARE\Microsoft\Windows\CurrentVersion\Run - IgfxTray
HKEY_LOCAL_MACHINE\SOFTWARE\Microsoft\Windows\CurrentVersion\Run - HotKeysCmds
HKEY_LOCAL_MACHINE\SOFTWARE\Microsoft\Windows\CurrentVersion\Run - Persistence

Once removed, there is no easy way to restore the tray icon other than restoring the registry entries from another machine, or reinstalling the driver.

Deployment Package

Manual removal is not convenient when rolling out large numbers of PCs. Please use the attached package for removal as part of a deployment or rollout.

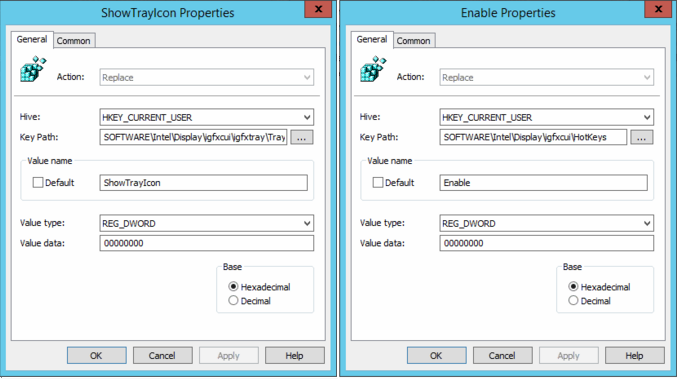
The package contains:

Note: ​The deployment task must be run with Administrative rights. The package includes registry entries for both the new and old method. The old method needs to be run once per machine as it is a machine setting. The new method needs to be run per user, as it is a user registry setting.

Applies to:


How to perform an EC update in Windows on Stone notebooks with an Insyde BIOS

Process

Note: Ensure the notebook is plugged into the AC adapter before proceeding with any EC or BIOS update.

In this example, we're updating a Stonebook Lite L105B to a custom EC that disables num lock.

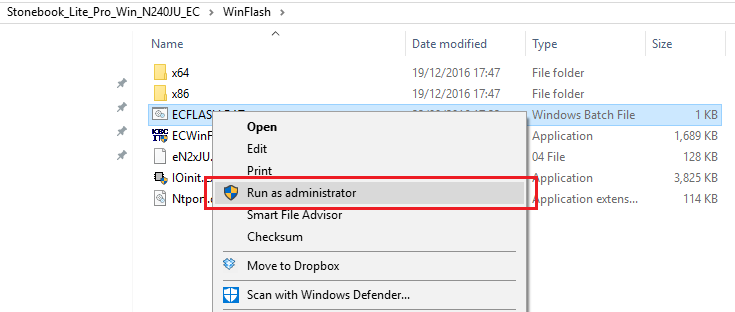
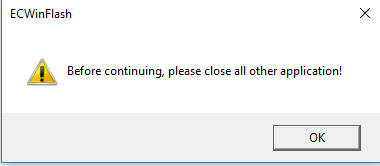
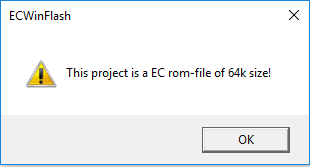
Download and extract the relevant EC files, then run the ECFLASH batch file. The correct batch file will be located in the WinFlash directory. This will start the process of updating the KBC/EC.

Note: You cannot use the keyboard whilst performing the update!

Once the EC update has been completed successfully the machine will automatically shut down. When the unit has turned off disconnect the power cable for 10 seconds, then reconnect and power the machine back on.

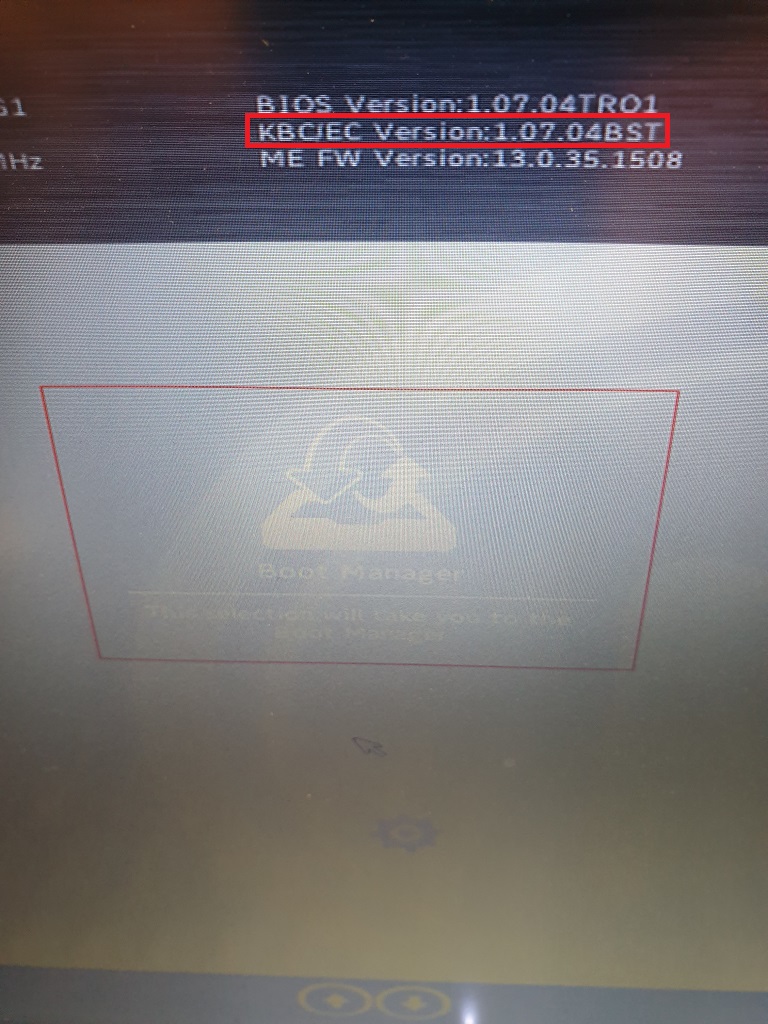
You can check in the BIOS to see if the update has been completed successfully, the update in this example should now be at 1.07.04BST.

Applies to:


Stone N120 User Manual

Stone N120 (W310CZ) User Manual

Please see attached.

Manual Errata: The manual preface page II refers to compliance to EuP standards for off-mode. The N120 is compliant with the updated ErP standard for standby and off-mode with the power draw in these states as 0.5W or less.

Applies to:


Stonebook Pro / Stonebook Lite User Manual, Hotkeys and Windows 7 Drivers

Stonebook Pro and StoneBook Lite

Please find attached the user manual for the following Stone notebooks:

Note: The attached manual refers to Model A and Model B systems. Model A is the Stonebook Lite (14") and Model B is the Stonebook Pro (15.6")

Function Keys / Hotkeys

The function keys will act as hotkeys when pressed whilst the FN key is held down. Some key combinations will also generate an on screen message when the Hotkey utility is installed.

Windows 7 Driver Support

The Stonebook Pro and Stonebook Lite have basic Windows 7 support. SCCM driver packs are available here or through the Driver Finder. A basic Windows 7 driver package for x86 and x64 is also available here. Stone have tested the Windows 7 drivers but recommend that you fully test your images and drivers before deploying systems.

If you are Installing Windows 7 from a USB Pen Drive:

You may need to add the USB 3.0 Drivers to the image - for more information see here.

If you are Booting From A Network Image

You may need to add the USB 3.0 Drivers to the image as well the the LAN Drivers (x86 or x64). You might need to remove older versions of the Realtek LAN Controller driver from your image first.

Note: The Stonebook Pro and Stonebook Lite include TPM 2.0 functionality. For this to work, the BIOS must be configured to boot in UEFI mode - to enable this, you must use the 6/9/16 or newer BIOS. Without this BIOS, the system will not be able to operate in UEFI mode with Windows 7, meaning that TPM functionality will not be available. If you switch from non-UEFI (legacy) to UEFI modes, you may need to remove the partitioning information on the notebooks hard drive to complete your operating system deployment.

Applies to:


Can I Upgrade to Windows 10 on a Stone Classmate 3?

Classmate 3 and Windows 10

We do not recommend that you attempt to upgrade to Windows 10 in your Classmate 3 yet. Our own testing has determined that the Classmate 3 may not be fully compatible with Windows 10. If you attempt to do an upgrade from Windows 8.1 to Windows 10, the upgrade may fail at around 70%. When it fails, it may leave your Classmate 3 in an unusable state.

For customers that are looking for the Windows 10 experience, we will be launching a range of new products that deliver the best in new Windows 10 features shortly.

If you have any queries or questions regarding this please don't hesitate to talk to one of the support team, or your account manager.

Applies to:


Stone Classmate 3 Firmware Features - Information for Installing an Operating System and Using Disk Imaging Software

New UEFI Firmware Features

The Stone Classmate 3 like many new tablets has been designed to provide the latest firmware features including:

This new firmware feature set is known as "UEFI" and it replaces the traditional BIOS code for configuring and booting a machine into the operating system.

The "BIOS setup" screen may look very similar to setup screens of previous models, but the BIOS code underneath is very different to models of just a few years ago.

As a Windows 8.x only unit, the Classmate 3 does not support legacy BIOS compatibility modes. This is a reflection upon the industry's drive to improve the usability and features of new systems, albeit at the cost of reducing legacy support.

What Does this Mean in Terms of Installing an Operating System?

This means that the operating system you want to install needs to support UEFI features, such as the GPT ("GUID Partition Table") method of disk partitioning. Windows 8.x supports this method. The older "master boot record" or MBR method of partitioning hard drives is not supported by the Classmate 3.

Note: This means that Windows 8.x images created in MBR mode cannot be used on the Classmate 3 until the boot loader has been reconfigured to use UEFI. Additionally, we always recommend the preparation of fresh software images for each model of machine you plan to deploy. For more information on this, please contact Stone support.

Installing Windows Again From Scratch

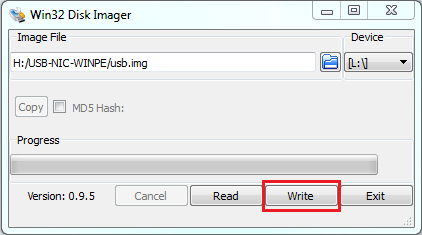
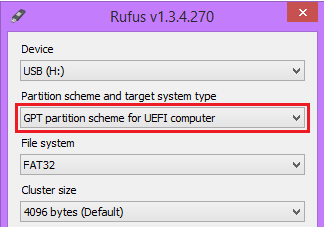
UEFI only support means that if you want to install a new, fresh copy of Windows 8.x, you must use an ISO to USB tool which can create the USB pen drive for use by UEFI systems, i.e. the disk formatting method is GPT.

One tool that can do this, for example, is Rufus.
What About Disk Imaging Software?

Methods of disk imaging also need to support the GPT partitioning method in order to boot. For example, if you have a Ghost 2.5.1 (11.5.1) bootable CD or pen drive based on Window Vista (Windows PE 2.0), this will not boot on the Classmate 3, as Windows Vista does not support GPT partitioning. You will not be able to actually boot from the CD or pen drive.

It is recommended on the Classmate 3 to use bootable media made using Windows 8.1, or Windows PE 5.0.

So How Can I Image the Classmate 3?

Stone can pre-install your choice of software image at our factory, saving you time in the deployment of your new equipment. If you are a network manager or technician you can also use the resources below to modify your existing imaging tools - where possible - to support UEFI systems such as the Classmate 3.

Alternatively, a potentially easier solution is to use tools within Windows 8 to create a Windows System Image onto an external hard disk. This will allow you to backup a system to be used as a master image and then restore the image onto other system.

A third party tutorial on this process is available here.

Tip: When working with the Classmate 3, use the F2 key to access BIOS setup by tapping the F2 key right from the moment you turn the unit on. Alternatively, use F11 to access the boot menu.

General Information on Modifying Existing Tools

The Classmate 3 does not have a wired LAN interface. This means that system images either need to be transferred using a USB pen drive or hard drive, or by using an optional USB3 to Gigabit LAN adapter (such as Stone part code CABUSB-224).

Ghost Solutions Suite 2.5.1 (11.5.1)

You will need to transfer your Ghost software to a Windows PE 5.0 environment. Please note however that Ghost 11.5.1 does not support disks larger than 2TB in size.

Short instructions:

(Advanced Users Only)

Alternatively, if you are a licensed Ghost Solutions Suite 2.5.1 customer we can provide an ISO image containing an Windows PE 5.0 and Ghost 11.5.1, upon you providing details of your Ghost license. This can be used on a USB pen drive. However, this media is unsupported. Contact Stone Support for more details on how to obtain this ISO image.

SCCM / Microsoft Deployment Toolkit

We have provided a link below to a Windows PE 5.0 image which will allow you to execute an imaging script over the network through the use of a mapped drive.

Method 1 - Use MDT WinPE Images - Short Instructions

(Advanced Users Only)

Note: Depending on your imaging system, converting the WIM file to USB is not an easy process. See this third party tutorial for more information regarding MDT, or here for WDS.

Method 2 - Use Stone PE Boot Media and a Network Drive - Short Instructions

Windows Deployment Services (WDS)

Method 1 - Use Modified Boot or Install Images - Short Instructions

(Advanced Users Only)

Note: Depending on your imaging system, converting the WIM file to USB is not an easy process. See this third party tutorial for more information regarding MDT, or here for WDS.

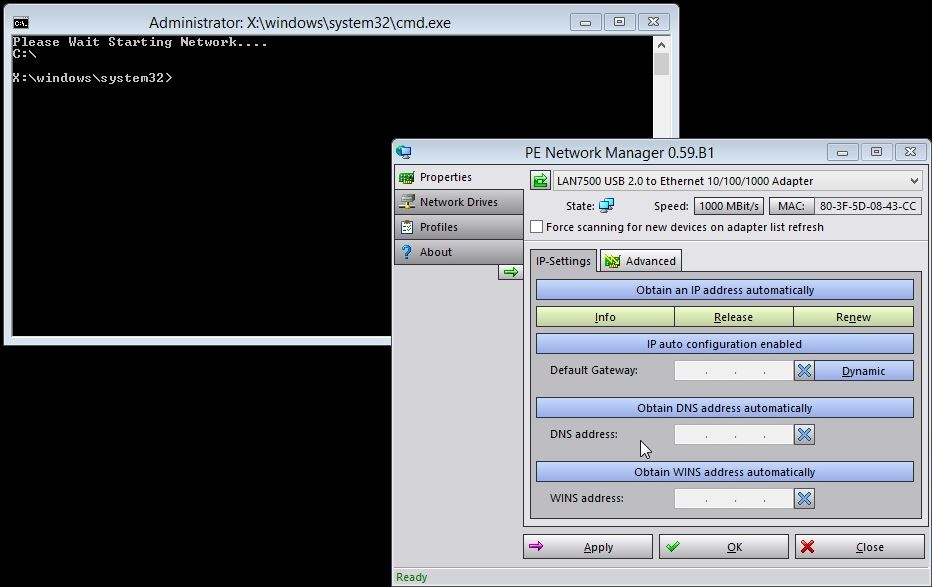
Drivers for the Stone USB/LAN Adapter

The driver packages below cover:

Windows 8.1 / PE 5.0 x86 (32-bit)

Windows 8.1 / PE 5.0 x64 (64-bit) (please note that the Classmate 3 does not support x64)

Drivers for the Classmate 3 Touchscreen and Keyboard (Intel I/O Drivers)

These are only available for x86 / 32-bit Windows 8.1.

Applies to:


How to perform the ANX USB-C Firmware update on the 10th Gen Stonebook Pro and Stonebook Lite (E revision)

What does this fix?

This firmware is designed to update the ANX chip in the notebook that controls the USB-C DisplayPort. The update brings better compatibility with external USB-C connected monitors and docking stations.

Prerequisites

The following instructions apply to the 10th gen Stonebook Pro and Stonebook Lite with the "E" revision suffix - L103E, L105E, P103E, P105E. Before running the ANX update tool, please ensure you have updated the BIOS, EC, and ANX drivers to the latest versions. These can all be found on the Stone Driver Finder

Note: Please ensure the notebook is plugged into the AC mains before proceeding with any EC or BIOS update.

Process

Download the latest ANX Firmware update tool, also found on the Stone Driver Finder, and extract the files, we then need to ascertain what version of the firmware we're running. To do this execute the " ANX74x_7327_Show.exe" found in the Show_tool_V0.6 folder. This will generate a version text file called log.txt. Check the version you are running and if it's older than 1.09.04 then proceed with the steps below.

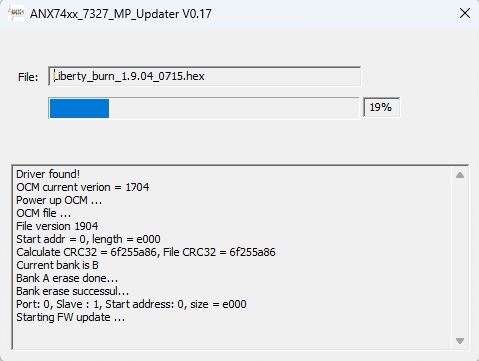
1. Run the ANX7411_OCM-V1.904_V17.exe to initiate the update. 

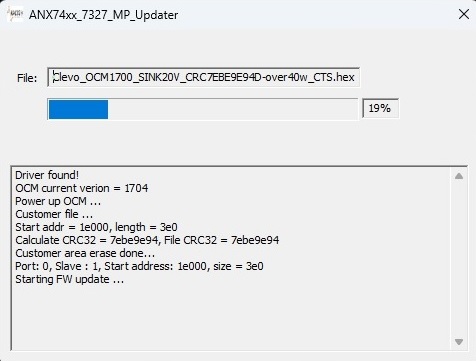
2. Run the Clevo_OCM1700_SINK20V_CR7EBE9E94D-over40w_CTS.exe to complete the update.

3. Restart the system

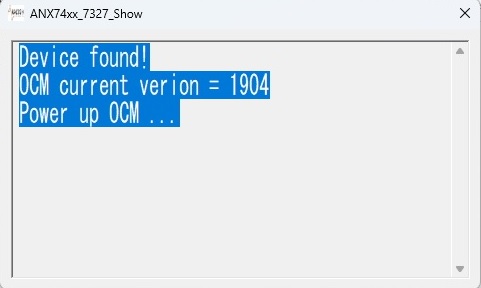
4. Run the ANX74x_7327_Show.exe in the show tool folder to check if the system has updated correctly. OCM current version = 1904 means it has updated correctly to the latest version 1.09.04.

Applies to:


Automatic Driver Deployment Utility for Windows XP

Windows XP Driver Deployment Utility

Please use this link to download the Ultimate DDU Utility (Approx 1.59GB).

This utility allows for fully automated installation of drivers and appropriate software for most Stone branded desktops and laptops from 2009 to early 2013.

Usage:

OR:

Note: See the related articles to check which models are compatible with this utility, as this utility shares its code with the DDU for CC3. 32-bit Windows XP only supported. This utility will install Windows Installer and Dotnet Frameworks as required.

Last updated 21/9/13.

Applies to:


Stonebook Mini User Manual and Hotkeys

Stonebook Pro and StoneBook Lite

Please find attached the user manual for the Stonebook Mini M10A (w515lu).

Function Keys / Hotkeys

The function keys will act as hotkeys when pressed whilst the FN key is held down. Some key combinations will also generate an on screen message when the Hotkey utility is installed.

Applies to:


Windows 10 Compatibility List for Stone Branded Products

Windows 10 Tested Models List

Please see the attached spreadsheet for a list of tested Stone systems or Stone motherboards for details on Windows 10 compatibility. Use the Stone driver finder to download updated drivers and/or use Windows Update to download the latest drivers post-Windows 10 installation.

Whilst the vast majority of models are compatible, models that are known to have compatibility problems are the NT309 and Classmate 3.

Applies to:


Stone N130 User Manual and Hotkeys

Stone N130 (W515TU) User Manual

Please see attached. A summary of the function keys is also below.

Function Keys / Hotkeys

The function keys will act as hotkeys when pressed whilst the FN key is held down. Some key combinations will also generate an on screen message when the Hotkey utility is installed.

Note: The N130 does not have driver support for x86 operating systems. Only drivers for Windows 7 x64 and Windows 8.1 x64 are available for the N130.


Applies to:


How to perform the ANX USB-C Firmware update on the 11th Gen Stonebook Pro and Stonebook Lite

What does this fix?

This firmware is designed to update the ANX chip in the notebook that controls the USB-C DisplayPort. The update brings better compatibility with external USB-C connected monitors and docking stations.

Prerequisites

The following instructions apply to the 11th gen Stonebook Pro and Stonebook Lite - L115A, P113A, P115A. Before running the ANX update tool, please ensure you have updated the BIOS, EC, and ANX drivers to the latest versions. These can all be found on the Stone Driver Finder

Note: Please ensure the notebook is plugged into the AC mains before proceeding with any EC or BIOS update.

Process

Download the latest ANX Firmware update tool, also found on the Stone Driver Finder, and extract the files, we then need to ascertain what version of the firmware we're running. To do this execute the " ANX74x_7327_Show.exe" found in the Show_tool_V0.6 folder. This will generate a version text file called log.txt. Check the version you are running and if it's older than 1.09.04 then proceed with the steps below.

1. Run the ANX7411_OCM-V1.904_V17.exe to initiate the update. 

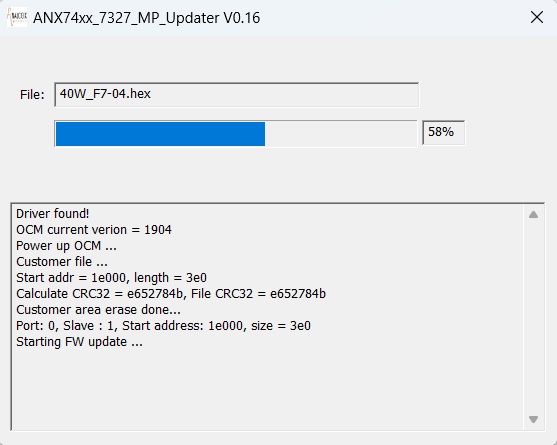
2. Run the Clevo_V19_PDO_40W_F7_04.exe to complete the update.

3. Restart the system

4. Run the ANX74x_7327_Show.exe in the show tool folder to check if the system has updated correctly. OCM current version = 1904 means it has updated correctly to the latest version 1.09.04.

Applies to:


Stone NT308 User Manual

Stone NT308 (W258ELQ1)

Please find attached the Stone NT308 (W258ELQ1) User Manual.

Note: The NT308 is normally supplied with Intel B960 processors and the HM70 chipset. This is a Notebook Series I model as referred to in the manual.

Applies to:

  • Stone NT308 Laptop


Stonebook Pro / Stonebook Lite - How to Update the EC Firmware

Updating the EC Firmware

Please only update the EC Firmware when instructed by Stone Support. Updating the EC Firmware as a matter of routine if you are not experiencing any issues is not recommended.

The instructions below are designed for Administrators. If you are not comfortable following these instructions please let your Stone Support representative know - and we will be happy to apply the update for you.

Note: The EC Firmware is separate to the main BIOS. The EC update does not include a BIOS update. This update procedure will also update the firmware of the attached battery.

Instructions

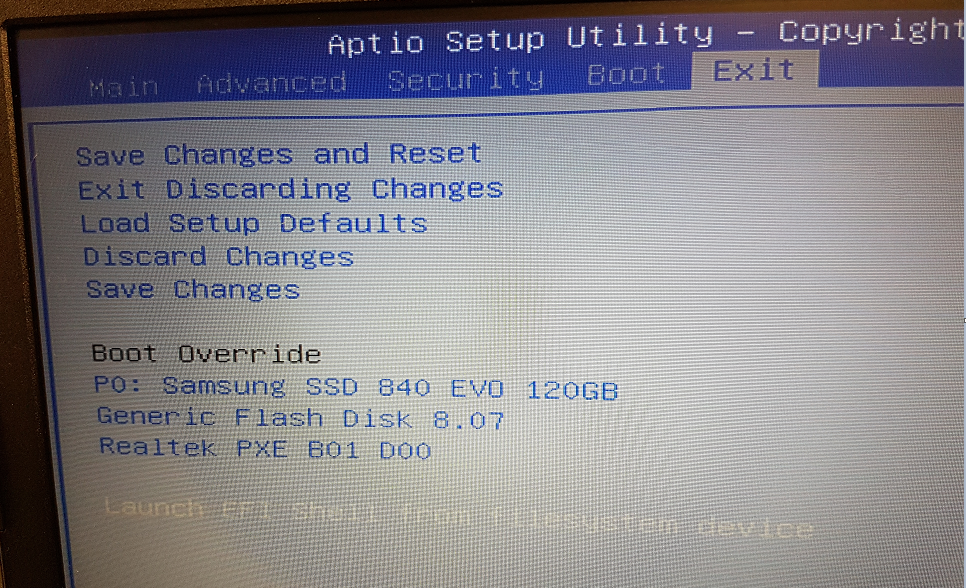
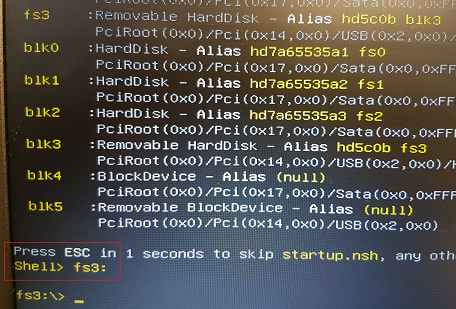
There are two methods to update the EC Firmware on this model:

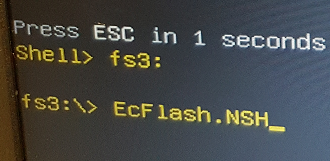
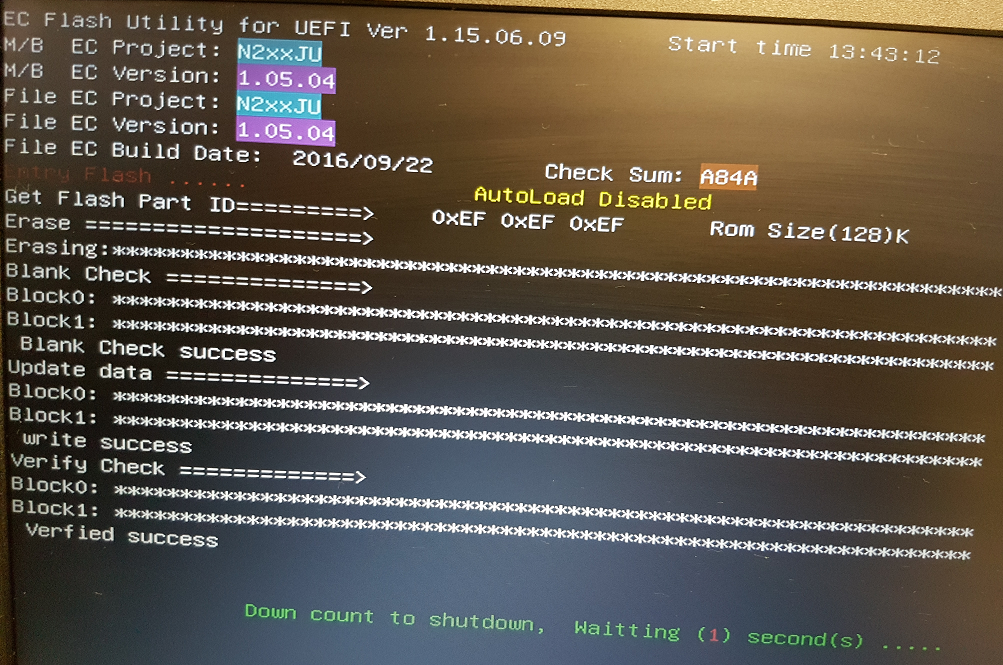
Steps - Windows EC Flash

The N240JU Windows EC Update can be downloaded here (last updated 15/1/17 to make the batch file more reliable).

Note: Do not remove the AC Adapter whilst the EC update is in progress, as this could render the battery or machine unusable. Wait until the system automatically shuts off before proceeding to remove the AC adapter.

Steps - EFI EC Flash

The N240JU EFI EC Update can be downloaded here.

This method requires that Windows is not running. 

Note: Do not remove the AC Adapter whilst the EC update is in progress, as this could render the battery or machine unusable. Wait until the system automatically shuts off before proceeding to remove the AC adapter.

Applies to:


Stone NT210-H User Manual

Stone NT210-H (W540SU1)

Please find attached the Stone NT210-H (W540SU1) User Manual.

Applies to:


Stone NT203-LV3 User Manual

Stone NT203-LV3 (S3101)

Please find attached the Stone NT203-LV3 (S3101) User Manual.

Applies to:


I created a Windows image with the BIOS configured to IDE mode. How can I move to an AHCI system?

Scenario

Consider the following situation:

Cause

The Windows AHCI driver is not left enabled when the system is installed on a system using an IDE controller. When you then boot the image on the AHCI system, the system does not have an AHCI driver enabled, so the system cannot boot.

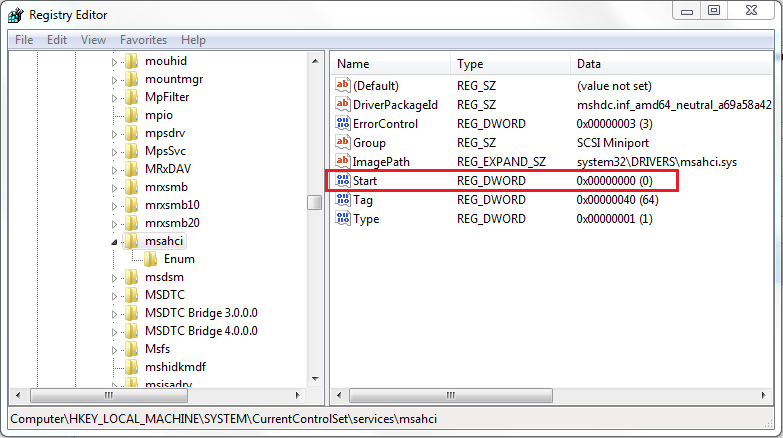
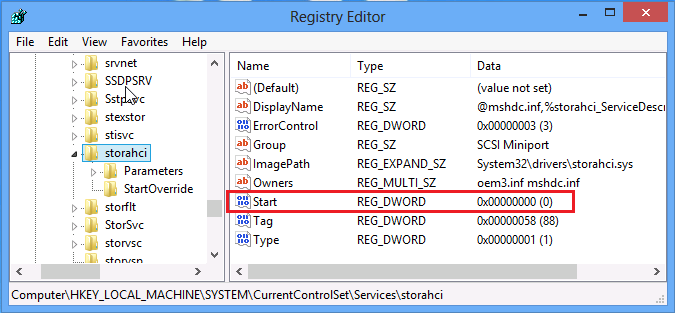
Resolution

Example

Windows 7 (service name is msahci)

Windows 8 (service name is storahci)

Applies to:


Stonebook Mini M10A - How to Update the EC Firmware

Updating the EC Firmware

Please only update the EC Firmware when instructed by Stone Support. Updating the EC Firmware as a matter of routine if you are not experiencing any issues is not recommended.

The instructions below are designed for Administrators. If you are not comfortable following these instructions please let your Stone Support representative know - and we will be happy to apply the update for you.

Note: The EC Firmware is separate to the main BIOS. The EC update does not include a BIOS update. This update procedure will also update the firmware of the attached battery.

Instructions

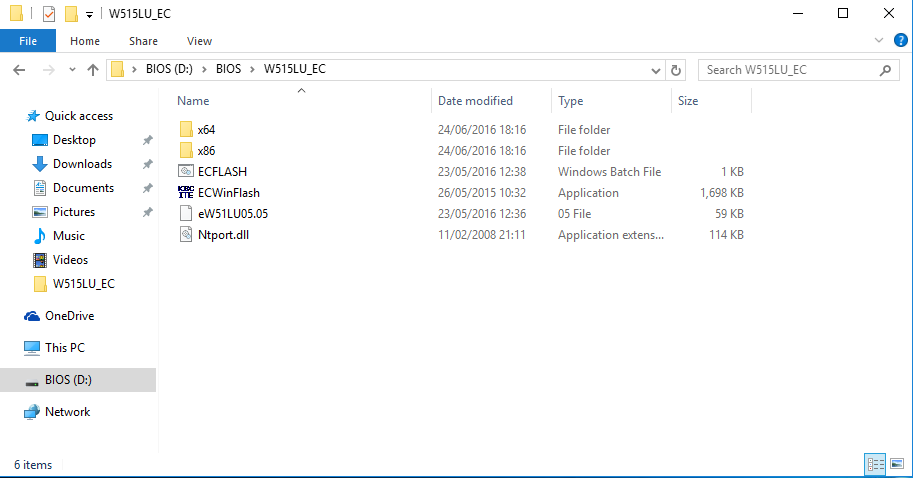
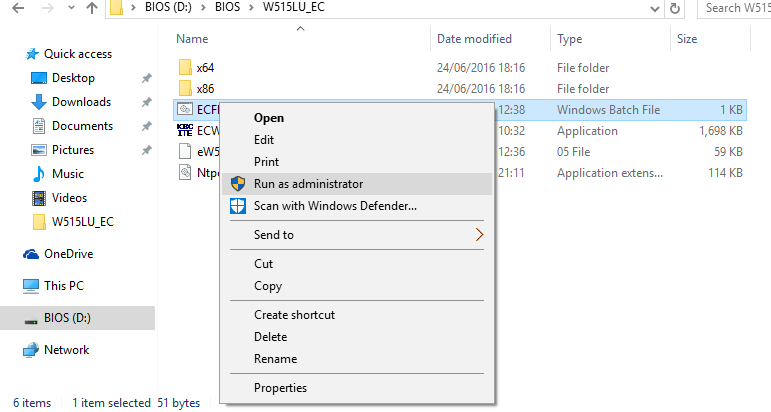
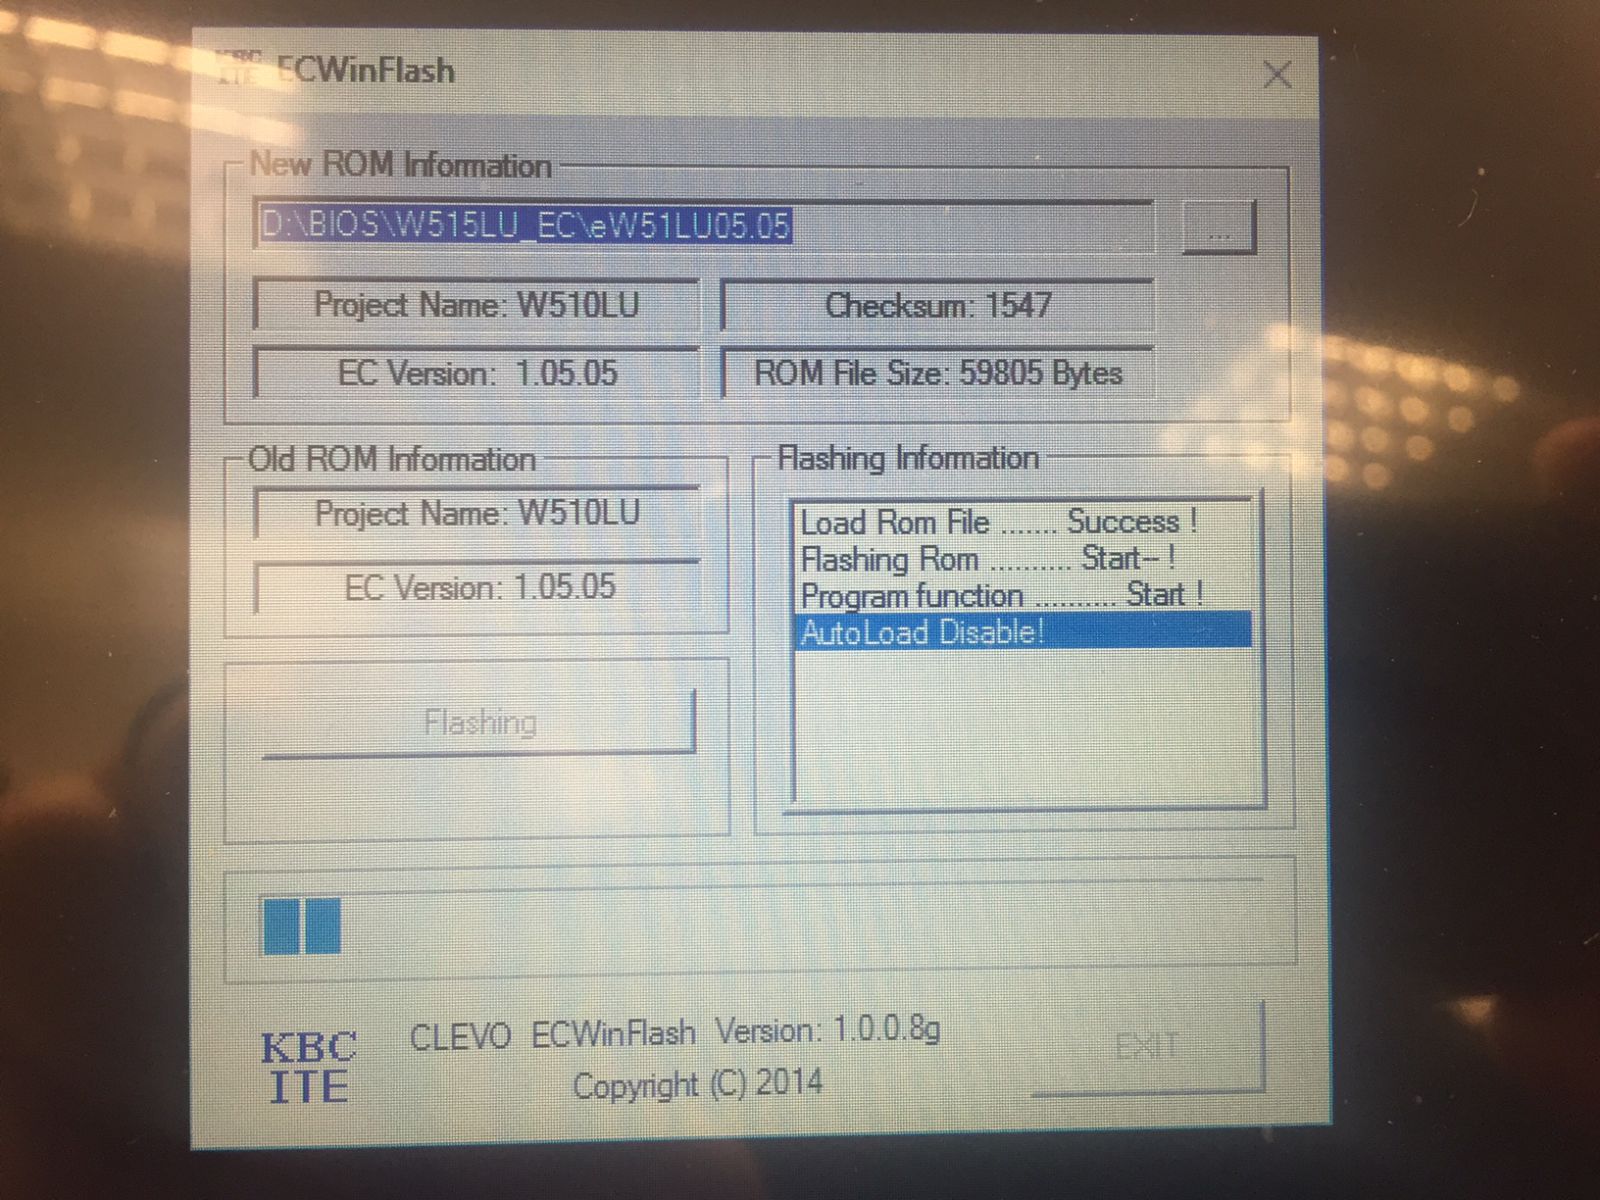
The W515LE EC update for Windows can be downloaded here (last update 15/1/17 to improve the reliability of the batch file).


Note: Do not remove the AC Adapter whilst the EC update is in progress, as this could render the battery or machine unusable. Wait until the system automatically shuts off before proceeding to remove the AC adapter.

Applies to:


Stone NT305-Pro User Manuals

Stone NT305-Pro (T5110)

Please find attached the Stone NT305-Pro (T5110) User Manual.

Applies to:


Stone Branded Products -> Laptops, Netbooks and Tablets -> Installation, Drivers and Software
https://kb.stonegroup.co.uk/index.php?CategoryID=22