Security Advisory: In May 2017, Intel released details regarding a critical security issue present in some Intel business chipsets.
The product referenced on this page is impacted by this security issue. The Intel Management Engine (ME) patch below contains a fix for this issue. This patch requires BIOS version 0610 or newer.
Windows Patch: 11.6.27.3264 (Asus Skylake / Kaby Lake)
DOS Patch: 11.6.27.3264 (Asus Skylake / Kaby Lake)
Additional actions may be required. For more details and for other mitigating actions to solve this Management Engine issue, please see here.
Please Note: Stone Computers systems based on the product referenced on this page, manufactured on or after 15/5/17, will have had the relevant patch pre-installed in the factory.
BIOS Files Available
This link contains the latest Stone release BIOS for this motherboard (v.0809, 17/8/17).
Please Note: We always recommend that you use the official Stone BIOS for your systems, rather than motherboard manufacturer generic BIOSes. This ensures that any customisations are preserved. The new Skylake range of systems include an "online" BIOS update feature however this will not deliver the latest official Stone BIOS.
- Previous BIOS file - this link contains the previous Stone release BIOS for this motherboard (v.0615R2 14/7/17).
- Previous BIOS file - this link contains the previous Stone release BIOS for this motherboard (v.0615).
- Previous BIOS file - this link contains the previous Stone release BIOS for this motherboard (v.0612).
How to Flash the BIOS
- Download the BIOS flash file above and extract it to a FAT32 formatted USB pen drive.
- Make sure the problem system is powered off.
- Plug in the pen drive
- Turn the system on and tap the F2 key to go into the BIOS
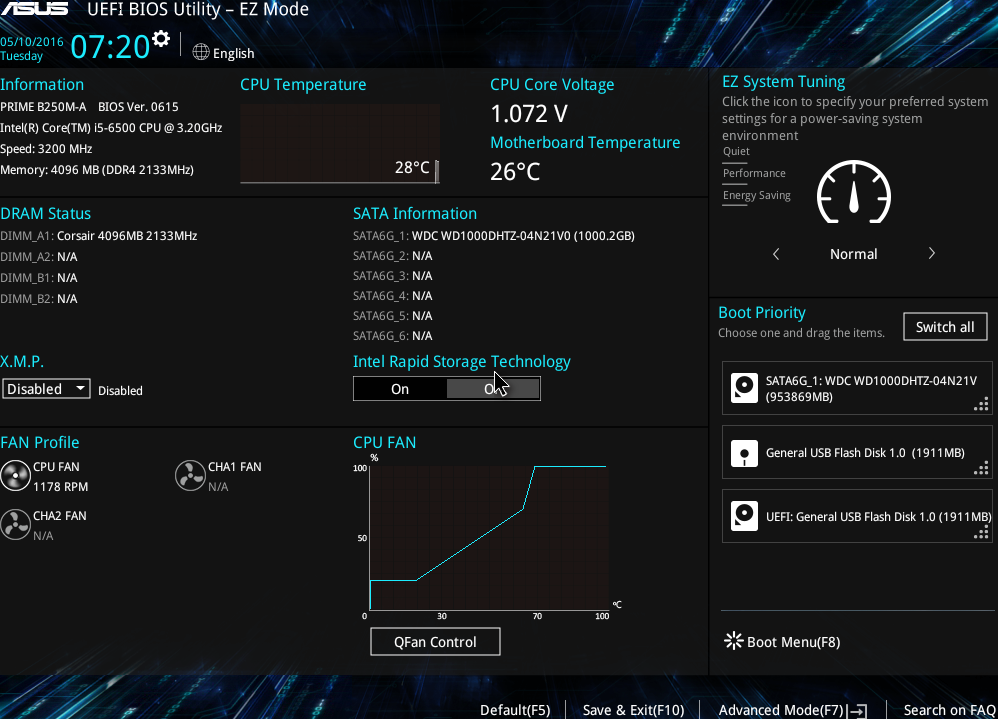
- Press F7 to go into the Advanced Mode
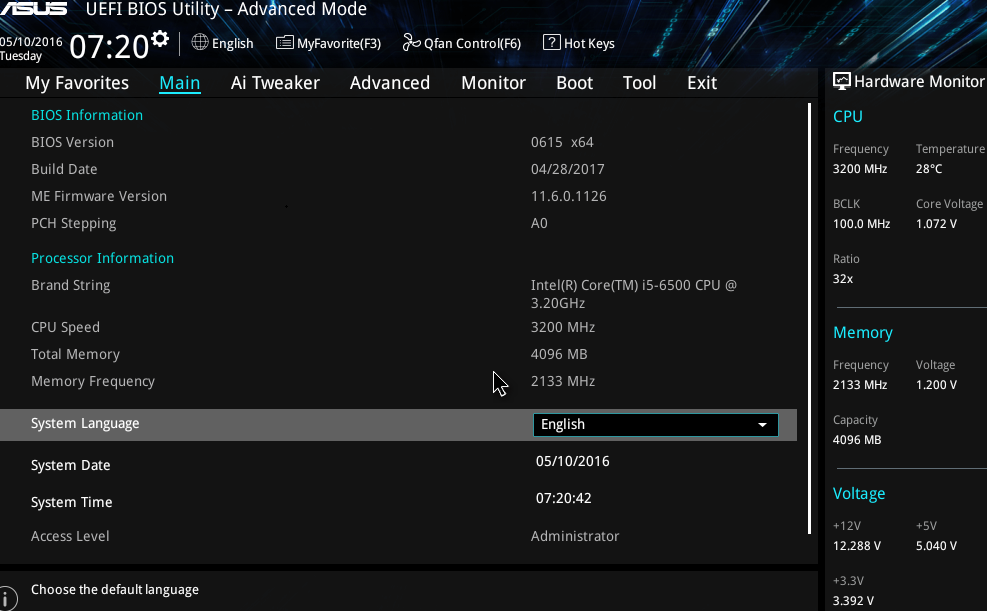
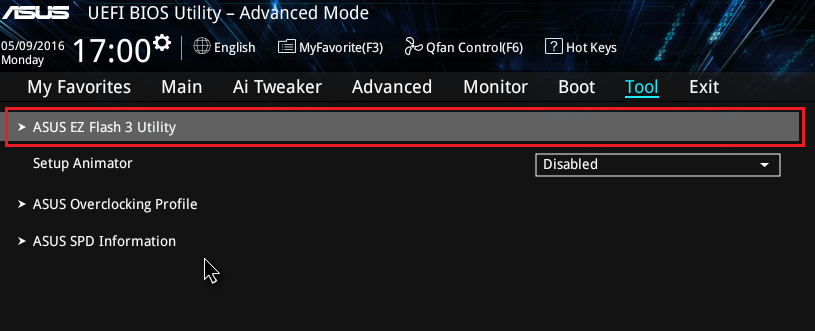
- Go to the Tool Menu and then Select ASUS EZ Flash 3 Utility
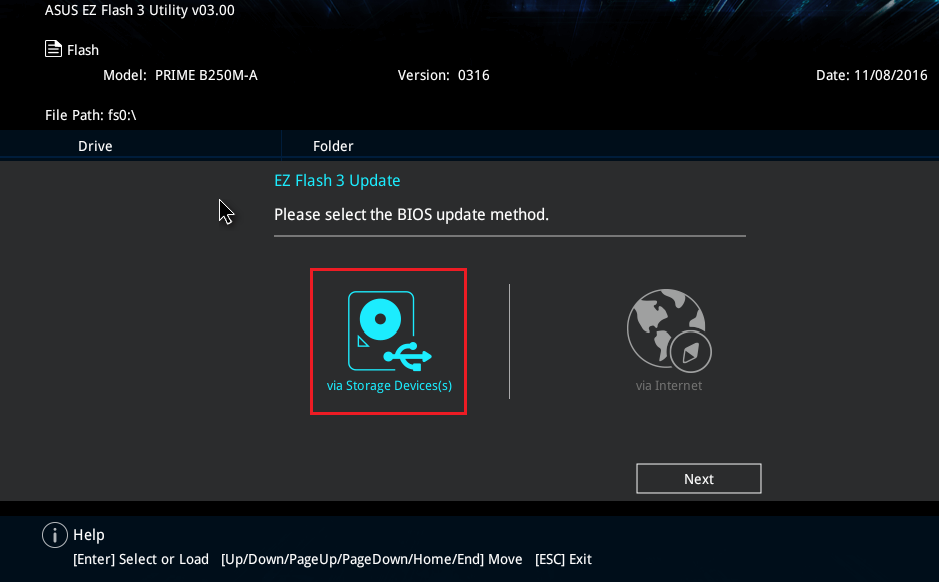
- Select to perform the update via "Storage Devices" and then double click Next. Whilst an online update is possible, you will not receive the Stone customised BIOS. We recommend you use the Stone customised BIOS, delivered via a USB pen drive.
- Now you need to locate the pen drive containing the .CAP BIOS file. The pen drive is usually FS0: if you plugged the pen drive in before turning the system on.
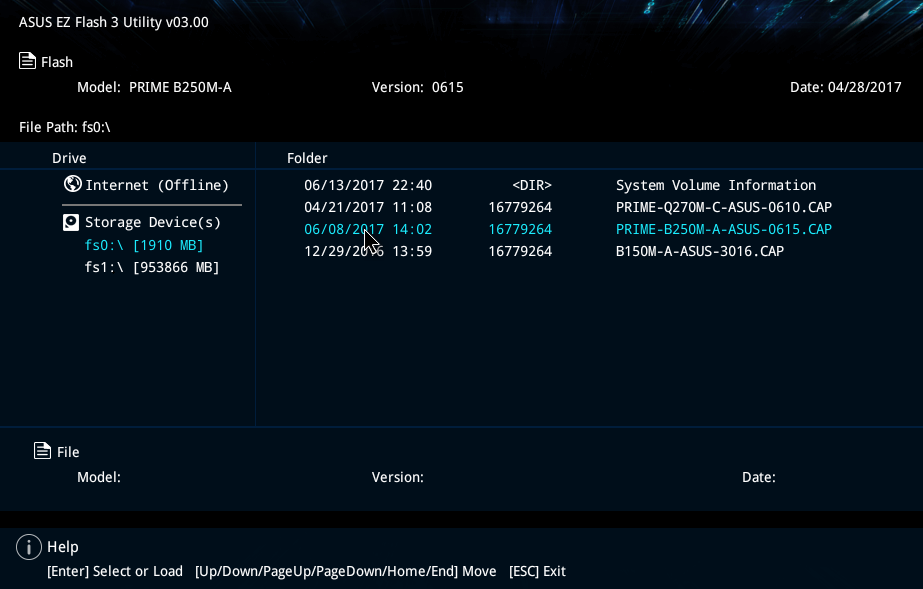
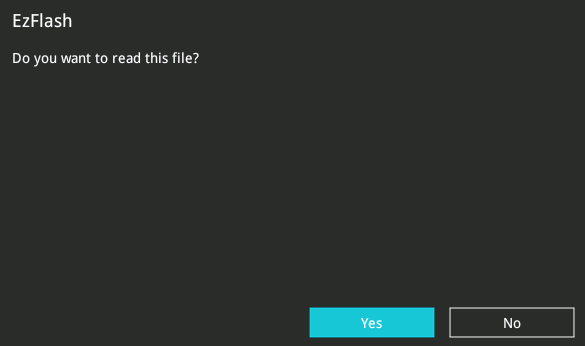
- Once you have located the BIOS .CAP file, simply click on it. You will be prompted for confirmation.
- Then accept the final confirmation.
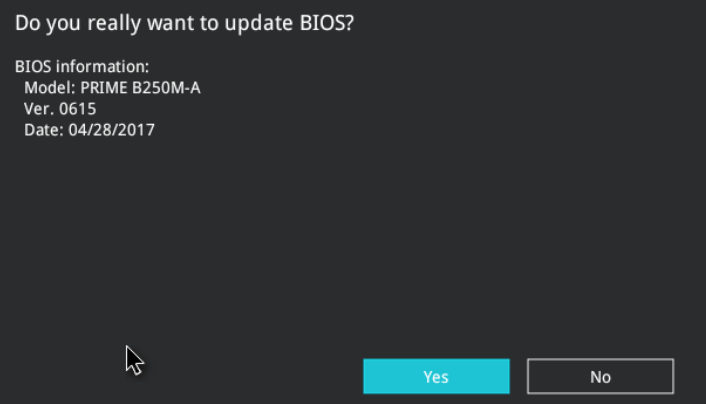
- Follow any further on screen instructions.
BIOS Settings to Note Before Flashing the BIOS
You may wish to note the BIOS settings below and check that they are still set correctly after completing the update procedure.
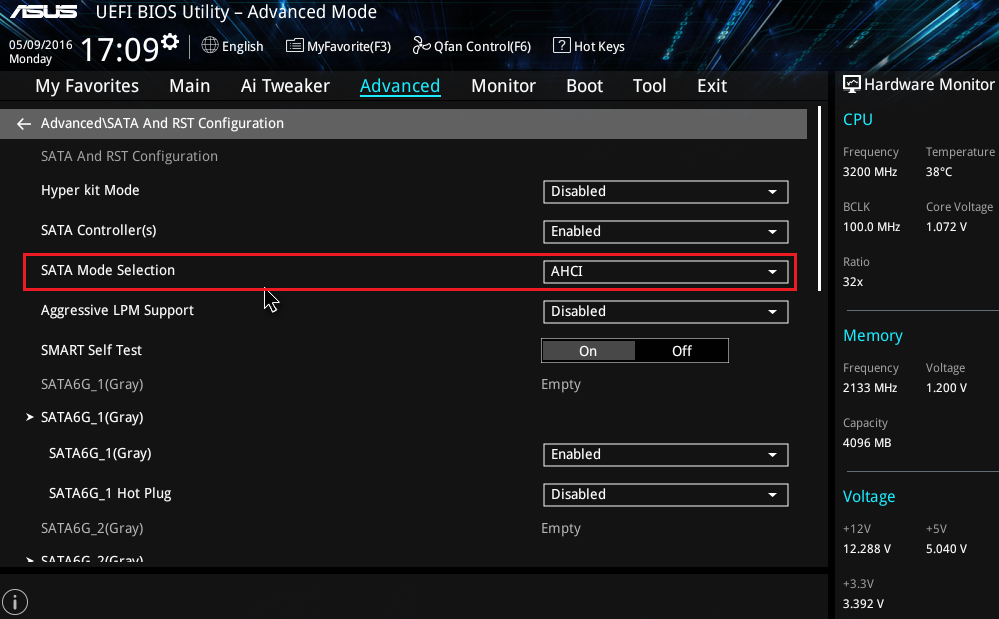
- Advanced > PCH Storage Configuration > SATA Mode Selection (this appears as Advanced > SATA and RST Configuration when you click on PCH Storage Configuration).
- Advanced > Trusted Computing (where a TPM module has been installed)
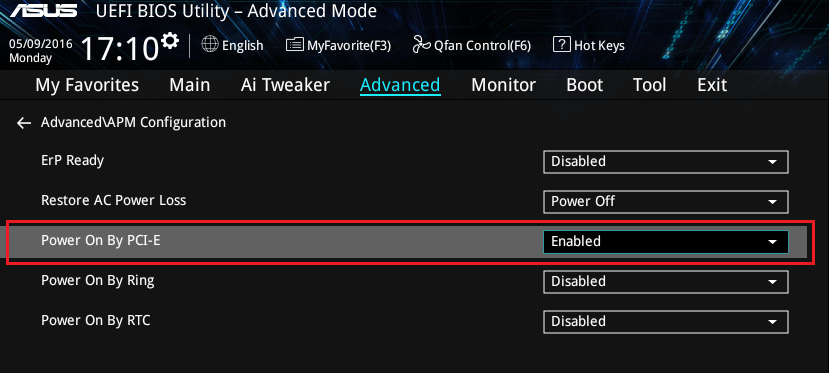
- Advanced > APM Configuration > Power On by PCI-E/PCI (needed for Wake on LAN to work)
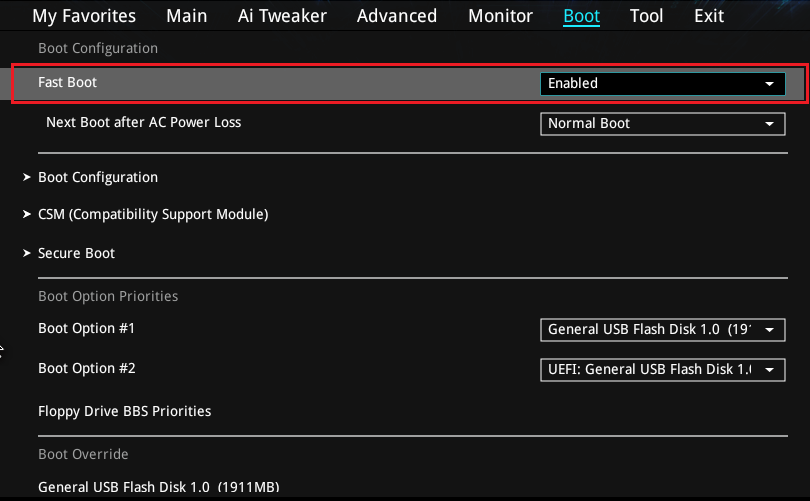
- Boot > Boot Configuration > Fast Boot
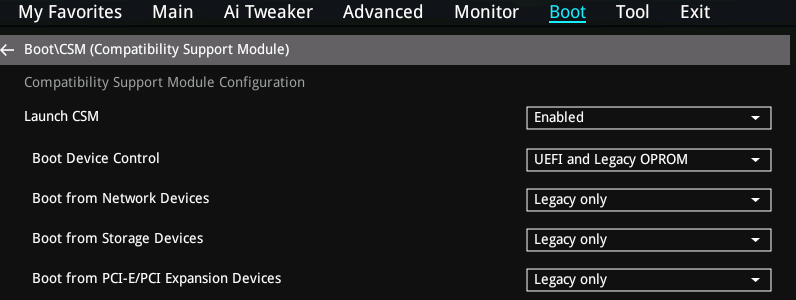
- Boot > CSM (Compatibility Support Module)
- Boot > Secure Boot
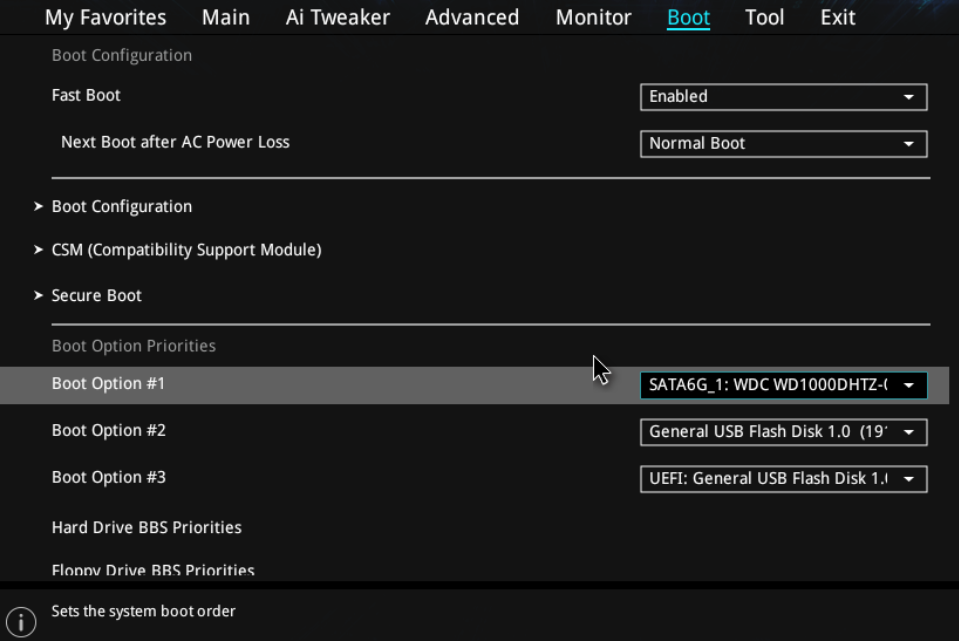
- Boot Option Priorities
When to Flash The BIOS
We recommend that you only update your BIOS if you are experiencing a product issue or if you have been advised to perform the upgrade by Stone Support.
Note: During the BIOS update process do not disconnect or turn off the power as this will render the system inoperable.
Applies to:
- Stone systems based on the Asus B250M-A motherboard (BOAMOT-488)
